
3D embroidered patches add vivid dimension and a professional finish to jackets, bags, hats, and more. Unlike flat designs, they gain their lift from padding and filled stitches that rise off the fabric, creating a tactile surface that can be seen from a distance and appreciated up close. For those seeking a hands-on approach, this guide explores 3D puff embroidery patches and the raised embroidery patch technique, with clear steps, troubleshooting tips, and examples drawn from projects ranging from simple logos to intricate character emblems. You’ll learn about choosing padding, stabilizers, and the steps on how to make 3D patches for consistent results, along with how to master puffy embroidery stitches for patches, testing densities on scrap fabric, and selecting backing options that minimize fraying during wear. By following these steps, you can create patches that look pro and stay durable across wear and washing, with finishes that stand up to repeated laundering and the rigors of everyday use.
If you’re exploring this craft, you’ll hear terms like three-dimensional patches, raised patch designs, and textured appliques that describe the same idea in different words. These LSI-inspired terms help builders and buyers connect the concept with techniques such as padding layers, dense satin stitches, and varied backing for depth. One practical angle is the use of custom 3D embroidered patches that blend texture and color to suit brands, teams, or personal style. By thinking in synonyms—three-dimensional emblems, puffed fabric badges, or raised embroidery designs—you can expand search results and discover new ideas. Overall, adopting these LSI-friendly variations helps ensure your content remains discoverable while staying informative for readers.
Understanding 3D embroidered patches: Depth, Texture, and Impact
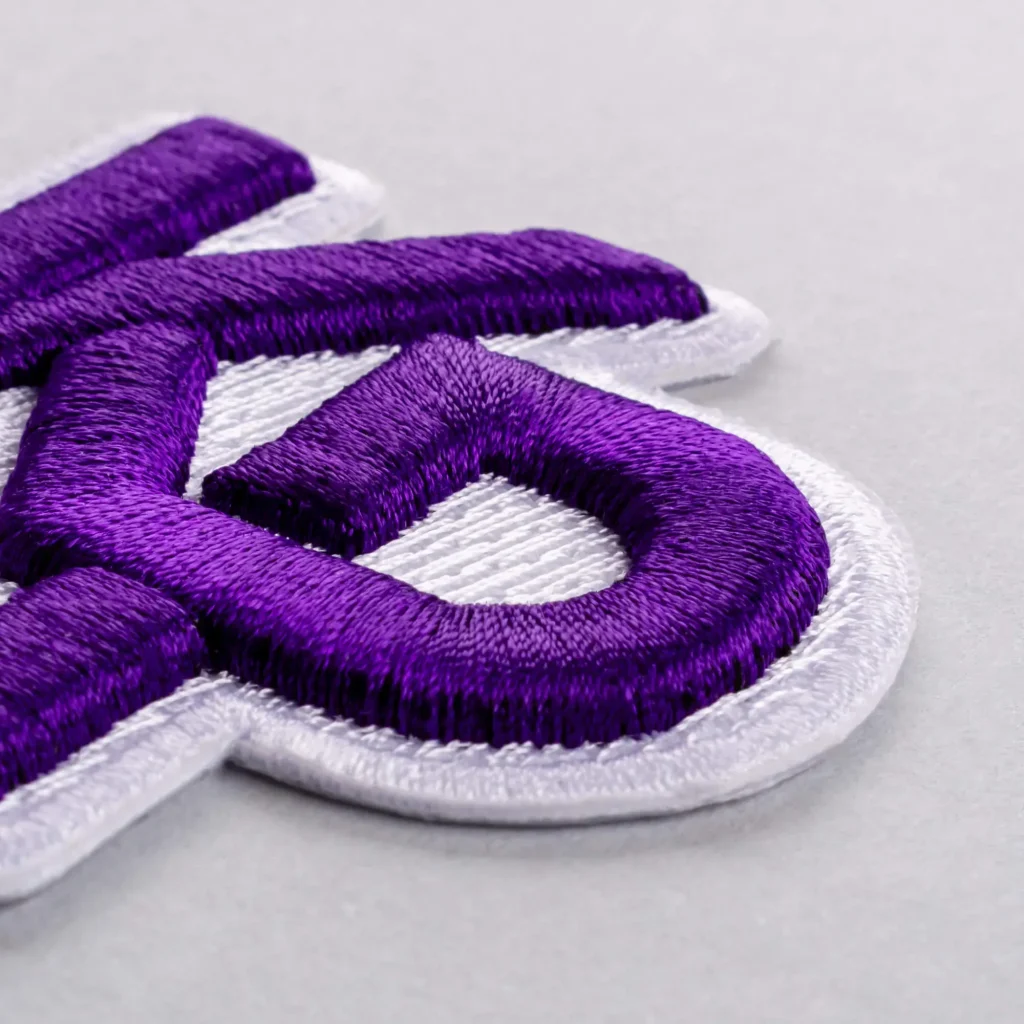
3D embroidered patches stand out by their raised surfaces that catch light and touch. The technique uses padding or foam under the stitches to create height, giving a tactile dimension to designs. When you plan your patch, think about color contrast, edge definition, and how many height levels you want to achieve for the design.
Compared with flat patches, 3D embroidered patches require careful stitching strategy, including stacking stitches and choosing appropriate backing. This approach aligns with the raised embroidery patch technique and is a natural fit for logos, characters, or emblems that benefit from depth. The result is a professional finish that can elevate apparel, bags, and accessories.
Choosing Materials and Stabilizers for 3D Puff Embroidery Patches
The backbone of a durable 3D puff embroidery patch is the right combination of padding, stabilizers, and backing. Thin foam or puff foam creates the puff, while tear-away or cut-away stabilizers keep fabric stable during multi-pass stitching. Matching adhesives and backings also ensure the patch adheres properly on jackets or hats.
Selecting high-quality embroidery threads in colors that pop against the fabric helps maximize the 3D effect. In addition, a sturdy merrow edge or satin border completes the patch and protects the raised areas from fraying. By thinking about materials first, you set the stage for consistent puff height and long-lasting results that customers will notice.
Designing for a Pro Finish: From Concept to Digitized Stitch Plan
A strong concept translates best when you digitize with two distinct stitch layers: an outline and a fill over padding. Start with simple silhouettes and clear edges, then build up with multiple satin or fill passes to create depth. If you’re new to the process, test your design on scrap fabric to refine density and padding placement.
The digitizing step is where you plan how the 3D puff will look once stitched. Consider multiple height levels, color blocking, and edge finishes that complement the backing. With the right plan, you can produce 3D embroidered patches that look studio-made rather than homemade, preserving a professional impression on any item. This is also useful to reference when asking, how to make 3D patches.
Techniques that Elevate Your Patch: Raised Embroidery Patch Technique and Layering
The raised embroidery patch technique relies on layering stitches around padding to build visible height. Practice exact spacing and consistent tension to keep the puff uniform across curves and corners. Layering also allows you to tailor height for focal areas while keeping surrounding areas flatter for balance.
Another key tactic is strategic color blocking and edge finishing. A bold border and carefully chosen thread colors help the puff read clearly from a distance and up close. This approach promotes a pro look whether you’re decorating a jacket, backpack, or cap with custom 3D embroidery.
Mastering Puffy Details: Puffy Embroidery Stitches for Patches
Puffy embroidery stitches for patches require careful stitch density. Too dense can feel stiff and bulky; too sparse may reveal padding. Start with a test patch to dial in the right density, then apply gradual fills to avoid winging or gaps near edges.
Control padding visibility by choosing padding thickness appropriate for the fabric and patch size. If the foam shows through, adjust the padding or add more top stitches. Properly executed, the puff height stays consistent, giving patches that look refined and durable.
Applications and Customization: Creating Custom 3D Embroidered Patches for Any Project
Custom 3D embroidered patches open many creative doors—from brand emblems on outerwear to character badges on hats or bags. The raised texture helps designs stand out in retail, cosplay, or team apparel, offering a tactile element that shoppers notice and remember.
This versatility also supports limited-edition patches for events or fundraisers. By combining the 3D effect with strong color choices and clean edge finishing, you can tailor patches to suit almost any project, audience, or product line, all while maintaining a professional, shop-like finish.
Frequently Asked Questions
What are 3D embroidered patches and what makes them stand out?
3D embroidered patches are fabric patches that incorporate padding under the embroidery to create a raised, tactile surface. They stand out because the puffed areas add height and texture, a result of the 3D puff embroidery patches technique and raised embroidery patch technique. This look works well on jackets, bags, hats, and other items that benefit from a tactile, professional finish.
How can you make 3D patches? A quick starter guide
To make 3D patches, start with a clear design and digitize it for two layers: an outline and a fill that sits over padding. Place a thin foam or padding behind the raised areas, then stitch the base and the top layers to push the thread against the padding. Build height in iterative passes, trim, and finish with a durable edge and suitable backing. This is a practical overview of how to make 3D patches using puffy embroidery stitches for patches.
What tools and materials do I need for 3D embroidered patches?
Key tools and materials include an embroidery machine (for 3D puff embroidery patches), stabilizers (tear-away or cut-away), foam or padding, top thread and embroidery thread, backing material (iron-on or sew-on), scissors or a rotary cutter, and digitizing software or a ready-made design. Using quality foam padding and sturdy stabilizers helps preserve the puff and prevent distortion. This setup covers 3D puff embroidery patches and custom 3D embroidered patches.
What is the raised embroidery patch technique and how does it create the puff?
The raised embroidery patch technique builds depth by layering stitches around padding to create a raised surface. You begin with a base outline, then apply fill stitches and carefully place padding behind the raised areas before finishing with top stitches. The result is a distinct 3D effect that defines 3D embroidered patches and puff details.
How should I finish and back 3D embroidered patches for durability?
For durability, choose a backing that matches how the patch will be used (iron-on, sew-on, or heat-activated) and finish edges with a merrow overlock or tight satin border. Use an appropriate stabilizer to prevent fabric distortion during stitching and washing. This approach is essential for long-lasting custom 3D embroidered patches and 3D puff embroidery patches.
How can I design custom 3D embroidered patches for branding or personal projects?
Designing custom 3D embroidered patches starts with a strong concept and color blocking to emphasize depth. Plan padding height, choose puffy embroidery stitches for patches, and ensure the design digitizes with two to three stitch passes for the puff. This process enables you to produce custom 3D embroidered patches that fit branding or personal projects while leveraging 3D puff embroidery patches techniques.
| Aspect | Summary | Notes / Tips |
|---|---|---|
| Definition & Standout Feature | 3D embroidered patches rise from the fabric using padding or foam under the embroidery and layered stitches, creating depth, texture, and a tactile surface. | Start with simple shapes and clear color contrast to emphasize the raised areas. |
| Core Technique: Padding & Layering | Padding behind raised areas plus multiple stitching passes build height and a “ puff” effect. | Keep padding uniform and plan several passes to avoid lumps. |
| Materials & Tools | Embroidery machine or hand setup, stabilizers, foam/padding, top and embroidery threads, backing material, scissors/rotary cutter, and digitizing software or design. | Use the right foam and high-quality stabilizers for a professional finish; beginners can start with simple outlines. |
| Step-by-Step Overview | Design & digitize; place padding; hoop/stabilize; stitch base outline and fill; add padding and top stitches; build height with layers; trim; finish edge; apply backing. | Plan two layers of stitching (outline and fill) and maintain taut fabric throughout. |
| Techniques for Pro Look | Layered stitching, strategic color blocking, feathered edge finishing, variable height, and careful fabric choice. | Experiment with height variations and contrast to maximize depth. |
| Common Pitfalls & Troubleshooting | Padding visibility, stitch density (too dense or too sparse), warping/fabric distortion, hooping accuracy. | Test on scrap fabric with similar backing; adjust density and padding thickness before final run. |
| Design Ideas & Applications | Brand emblems, character badges, club/team patches, limited editions, home décor accents. | Apply versatile color blocking to suit various fabrics and uses. |
| Getting Started & Beginner Tips | Start small, practice with two-layer textures, maintain tension, experiment with padding materials, document settings for repeatability. | Keep a patch tester handy to dial in puff height and edge finishing. |
| Finishing & Backing | Choose edging (merrow or satin), apply backing (iron-on, sew-on, or heat-activated), reinforce with stabilizer for frequent washing. | Durable edges and backing preserve 3D effect over time. |