
DIY 3D embroidered patches have exploded in popularity as a fun, practical way to personalize quilts and fabrics. From concept to quilt-ready finishes, these patches add texture, color, and a tactile dimension that flat embroidery simply cannot match for quilt patches. Whether you are patching a favorite quilt block, embellishing a handmade throw, or creating a cohesive series of embroidery patches for a quilt top, mastering the basics of DIY 3D embroidered patches will elevate your project and give you a lasting, maker-focused result. In this guide, you will learn how to design, stitch, and attach patches that pop off the fabric while remaining durable through multiple washes, using 3D embroidery techniques. We will cover the essentials for beginners and offer pro tips for more advanced DIY fabric patch design and execution, including how to make embroidered patches, using common materials and tools that are easy to source.
Beyond the basics, this topic unfolds as a study of textured fabric badges and layered stitching that brings designs to life on quilts and garments. In LSI-friendly terms, dimensional embroidery, puff patches, foam-backed textures, and decorative appliqué help describe the same idea from different angles. Whether you call them fabric patches, quilt embellishments, or decorative motifs, the aim is durable, wash-ready embellishment that integrates with blocks and borders. By focusing on 3D stitching concepts and design transfer, you can turn sketches into raised, tactile elements that enhance your quilt patches and DIY fabric patch design.
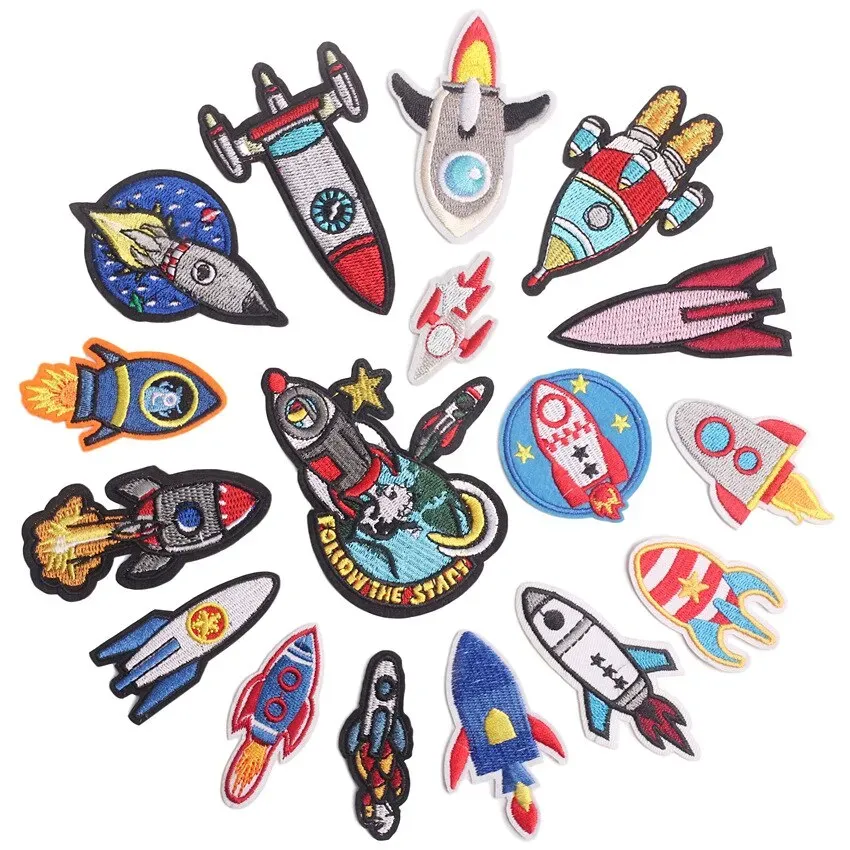
DIY 3D embroidered patches: From Concept to Quilt-Ready Finish
DIY 3D embroidered patches transform simple fabric into tactile art that complements quilt patches with texture and color. From idea to stitched reality, planning for how the patch will sit among blocks helps ensure a cohesive overall design. In this phase, consider the quilt’s palette, fabric textures, and how the raised elements will read from a distance once the quilt is assembled.
This guide centers on how to make embroidered patches that pop, using 3D puff techniques and thoughtful placement. You’ll learn about selecting stabilizers, choosing the right foam or felt behind the stitching, and planning stitch counts so the patch remains durable through multiple washes. By starting with a clear concept and a simple transfer method, you set the stage for successful DIY fabric patch design that elevates your quilt top.
Mastering 3D embroidery techniques to add depth to embroidery patches
Depth and dimension come from deliberate layering and stitch height. The core 3D embroidery techniques use foam or felt beneath the stitches to lift the motif away from the fabric, creating a tactile focal point on your embroidery patches. Start with a secure underlay to hold the shape, then add the puff layer to achieve the desired height while keeping wearability in mind for quilt use.
Beyond puffing, long-and-short stitches and satin borders define edges and shading. Careful stitch placement and slower stitching help maintain uniform height and prevent warping. Finishing with a dense satin edge produces a crisp patch silhouette that reads clearly when integrated into a quilt top.
DIY fabric patch design: how to make embroidered patches that fit your quilt
Turning a concept into a finished patch begins with sketching or digitally outlining shapes, color blocks, and stitch counts. When planning for quilt patches, visualize how each patch will interact with neighboring fabrics and blocks. A simple, bold silhouette often yields the strongest impact in a quilt, especially when viewed from across the room.
Transferring designs and selecting materials are crucial steps in how to make embroidered patches. Use water-soluble markers or transfer pens to map shapes, and decide which sections will be elevated with 3D texture. This stage also lets you determine where you’ll use foam, felt, or other puff materials to add dimension without compromising washability.
Stabilizers, backing, and edge finishing for durable patches
Stabilizers provide essential support during stitching and play a major role in how well patches hold up in a quilt. Tear-away stabilizers are great for dense machine embroidery on smaller patches, while cutaway stabilizers offer extra support for thicker fabrics or multi-layered 3D elements. For frequent washing, wash-away or fusible backings help reduce fraying and edge distortion.
Edge finishing and backing choices influence durability and handling. A dense satin edge helps lock in threads and preserves the patch’s shape, while fusible backing can simplify attachment if you’re not sewing the patch directly. When finished, trim stabilizers close to the edge to minimize bulk and ensure a clean, quilt-ready integration.
From transfer to layout: cutting patches and attaching to the quilt top
Once embroidery is complete, lay out the patches on the quilt top to plan final placement and spacing. Cutting patches with clean edges and a small seam allowance ensures neat results that won’t interfere with seam lines. Pinking shears or a sharp rotary cutter help maintain consistent edges suitable for quilt patches.
Attaching patches involves secure stitching and mindful integration with the quilting process. Sew around the edge with a tight satin stitch or an attractive decorative stitch to anchor the 3D elements. Reinforce the back if the quilt will see heavy use, then complete the look with a simple quilting pattern that ties the patches together without overpowering them.
Care, troubleshooting, and pro tips for DIY patchwork projects
Proper care extends the life of patches on a quilt top. Pre-washing the finished quilt and following fabric washing instructions helps preserve 3D textures and patch heights. Storing the completed quilt in a cool, dry place also supports long-term dimensional stability.
Common issues can be addressed with simple fixes: curling edges, uneven puff, or color bleed. Re-stitch edges or tighten the satin border to reduce curling, and test transfer methods on scrap fabric before applying to the main project. Practicing on scraps before starting ensures better stitch density, puff levels, and overall patch quality for quilt patches.
Frequently Asked Questions
What are DIY 3D embroidered patches and how do they differ from embroidery patches?
DIY 3D embroidered patches are raised, textured decorations created with foam or felt under dense stitching, offering dimension beyond standard embroidery patches. They rely on 3D embroidery techniques to push thread away from the fabric, making designs pop on quilts and garments. This guide covers the design‑to‑quilt‑ready process—from concept to secure attachment—so patches stay durable through washes.
What tools and materials do I need for DIY 3D embroidered patches, especially for quilt patches?
For DIY 3D embroidered patches, assemble stabilizers (tear‑away or cutaway), foam or felt to create puff, an embroidery hoop, fabric scraps or a printed patch design, and an embroidery machine or hand stitching setup. Add fusible web or fabric glue for attachment, backing fabric, batting, and a range of threads for color. For quilt patches, choose wash‑able stabilizers and a compatible edge finish to ensure long‑lasting results.
How should I approach DIY fabric patch design for quilt patches to ensure strong visuals and stitch stability?
Begin with a clear DIY fabric patch design in mind. Sketch shapes, map colors, and decide which elements will be elevated with 3D puff, keeping the patch simple for quilt patches. Transfer the design onto fabric with a water‑soluble marker, then plan stitch counts and edge finishing before stitching to maintain durability and readability on the quilt.
What are the core 3D embroidery techniques used in DIY 3D embroidered patches, and how do I apply them?
Core techniques include 3D puff embroidery (with foam or felt behind stitches), layered long‑and‑short stitches for shading, and a dense satin border to define the patch edge. Apply them by starting with a secure underlay, adding foam or felt behind raised areas, and stitching slowly to maintain consistent height—especially important for quilt patches that will be washed.
How do I attach and finish patches on a quilt top to ensure durability when using DIY 3D embroidered patches?
Position patches on the quilt top and secure with a tight satin stitch or zigzag around the edge. Use fusible backing as an attachment option, but test heat to avoid flattening 3D layers. Finish with a backing layer (muslin or fabric) and a neat edge, then quilt around the patches to integrate them into the top.
What common issues arise with DIY 3D embroidered patches after washing, and how can I troubleshoot them?
Common issues include curling edges, uneven puff, and color bleed. Address curling by securing the edge with additional stitches, and fix uneven puff by re‑stitching and pressing from the back with a cloth. Use high‑quality threads, test design transfers first, and wash cold on the first cycle to preserve height and durability.
| Aspect | Summary | Notes |
|---|---|---|
| Overview | 3D patches add texture, color, and a tactile dimension to quilts and fabrics; they stand out from flat embroidery and elevate projects. | Useful for patching blocks, embellishing throws, or building a cohesive quilt patch series. |
| Materials & Tools | Fabric scraps, stabilizers (tear-away or wash-away), an embroidery hoop, embroidery machine or hand needles, foam/felt for 3D puff, fusible web or fabric glue, thread colors, scissors, fabric marker, backing fabric and batting. | Prepared toolkit; mix of stabilizers, hoop, foam or felt for puff, and finishing supplies. |
| Design & Concept | Start with a clear concept; sketch or design digitally; plan color harmony with the quilt; keep shapes simple and legible; decide which parts will be elevated. | Transfer designs to fabric; determine puff height; maintain balance within quilt layout. |
| 3D Embroidery Techniques | 3D puff embroidery using foam or felt under stitches; layered underlay and height control; long/short stitches for shading; satin border for clean edges; sew slowly to avoid shifting. | Techniques to experiment: layered stitching, avoid stiff fabrics, decorative threads, combine hand and machine techniques. |
| Stabilizers, Backing & Edge Finishing | Tear-away, cutaway, and wash-away stabilizers; dense satin edges; test fusible backing; trim stabilizer after finishing. | Ensure durability and clean edges; plan for wash testing. |
| Transferring & Cutting | Lay out patches on the quilt top; cut edges clean with small seam allowances; pinking shears or sharp rotary cutter; press fusible backing without flattening 3D layers. | Test placement with pins; adhere patches if using fusible backing. |
| Sewing & Integrating | Stitch around patch edges with tight satin stitches; or decorative stitches; ensure top thread color matches; reinforce back with light fabric if heavily used. | Sew patches securely; finish with coordinated quilting around patches. |
| Finishing & Care | Check edges for loose threads; use fray check if needed; pre-wash quilt to test behavior; follow washing instructions; store quilt to maintain puff height. | Durability and care for long-term wear. |
| Troubleshooting & Pro Tips | Address curling edges with extra stitches or a tighter satin border; re-stitch puffiness; test transfers; use quality threads; practice on scrap fabric. | Guidance to refine technique and avoid common issues. |
Summary
DIY 3D embroidered patches unleash a tactile, colorful dimension on quilts and fabrics, adding texture and depth that flat embroidery cannot match. By designing thoughtful patches, selecting the right stabilizers, employing 3D puff techniques, and attaching patches securely to the quilt top, you can achieve a cohesive, durable finish that remains comfortable to handle. This approach blends creativity with practical technique, welcoming beginners and scaling to more complex designs, and shows that 3D embroidery offers a versatile way to tell stories through fabric, color, and texture. The journey from concept to quilt-ready patches is both functional and artistic, producing handmade elements that enhance quilts while withstanding repeated washing.