
DTF transfer settings govern how heat, time, pressure, and cure combine to bond a film-based image to fabric, delivering durable color and a soft hand. Mastering these parameters starts with a practical baseline and a plan for systematic testing across fabrics. A key SEO-friendly note is to respect the role of DTF transfer temperature as the most influential dial. Time controls how long the adhesive interacts with the fabric and how well the ink sets, guiding overall transfer quality. By documenting results and refining your baseline, you’ll reduce misprints and improve wash durability across garments.
In other words, think of the process as a heat-press recipe where film adhesion and fabric compatibility are driven by precise timing, temperature, and pressure. The explanation can be expanded using synonyms and related concepts such as substrate compatibility, ink adhesion, and curing steps to support readers who search for practical guidance. Understanding the cure process and how it interacts with different textiles helps you avoid edge lifts and cracking across materials. By presenting a network of related ideas—from heat and dwell time to material behavior—you create a web-friendly guide that supports optimization and troubleshooting.
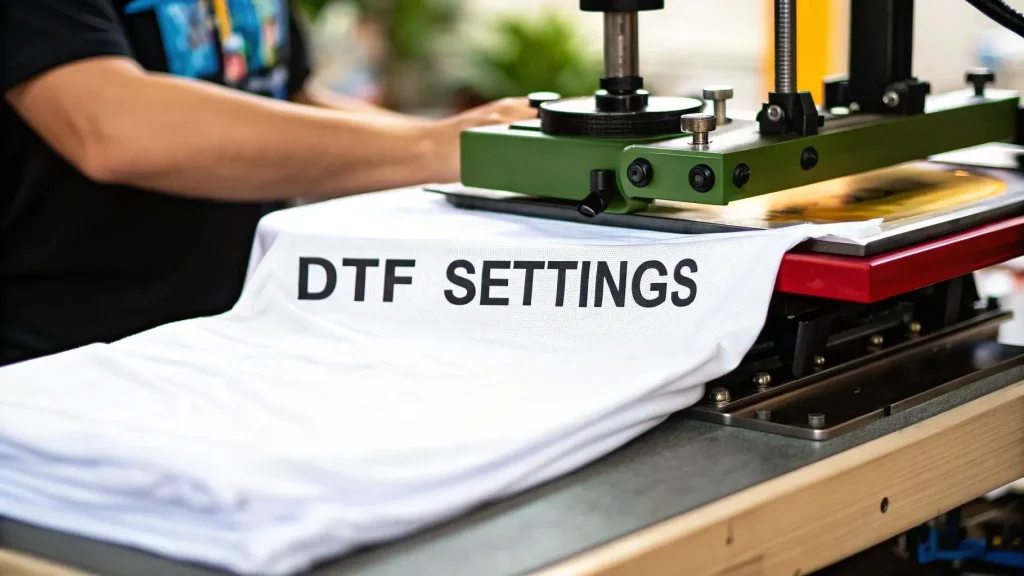
DTF Transfer Settings: Core Variables and Baseline Best Practices
DTF transfer settings comprise the four core variables—temperature, time, pressure, and cure—that work together like a recipe. Mastery of these elements yields consistent adhesion, vibrant color, and a soft hand on finished garments. Start with a baseline and then fine‑tune each factor one at a time, using controlled test swatches to track changes in results such as edge fidelity, color density, and wash durability.
From there, document your baseline so you have a repeatable reference across fabrics, films, and substrates. Understanding how temperature, dwell time, pressure, and curing interact helps you predict outcomes on different garment types and film brands, reducing misprints and promoting reliable, repeatable production.
DTF Transfer Temperature: Balancing Heat, Color, and Adhesion
Temperature is the most influential dial in DTF transfer settings. A practical starting point is around 320°F (160°C) for many fabrics, with small 5–10 degree adjustments guided by results. This setting directly affects ink adhesion, adhesive bonding, and color integrity, so careful tuning is essential for crisp images and durable transfers.
Consider fabric type, film and adhesive tolerances, and substrate color when adjusting temperature. Cotton and blends tolerate higher heat; polyester and technical fabrics may need lower temps and shorter durations to prevent scorching. Always test on swatches that match your production fabrics and refer to the film manufacturer’s guidelines to avoid color shift or edge bleeding.
DTF Transfer Time Settings: Dwell Time for Crisp Details and Fabric Safety
Time controls how long the adhesive interacts with the fabric and how long the ink has to set. A baseline of 12–15 seconds at 320°F (160°C) balances quick production with solid transfer. Shorter times can lead to incomplete adhesion, while longer times increase the risk of scorching on delicate fabrics.
Adjust dwell time in concert with temperature and fabric type. For delicate fabrics or glossy films, consider 10–12 seconds; for heavy fabrics or thick blends, 16–20 seconds may be warranted. Always pair any time adjustment with a temperature check to avoid overexposure or color bleed.
DTF Pressure Guidelines: Ensuring Even Contact Across Fabrics
Pressure ensures the film makes uniform contact with the garment. The goal is medium to firm pressure that creates a stable bond without crushing surface texture or causing ink smear. Consistent pressure is critical to prevent ghosting, edge lift, or uneven adhesion.
Use a calibrated heat press or pressure regulator to reproduce force across prints. If you lack measurement tools, press with firm but controlled force so the garment plumps slightly under the platen without digging in. Thick or textured fabrics may require modestly higher pressure to guarantee full fiber contact.
DTF Cure Process: Post-Press Techniques for Wash Durability
Curing solidifies the adhesive and inks, enhancing wash durability and reducing edge lift. A practical cure approach includes a brief post‑press rest and, depending on the process, a second pass or a cold/warm rest to stabilize the print before handling.
Use a protective sheet during reheating to prevent scorching and to keep the surface pristine. Always follow the adhesive manufacturer’s curing windows, as proper cure timing can dramatically improve adhesion longevity and resistance to abrasion after multiple washes.
Direct-to-Film Printing Troubleshooting and Calibration: Practical Fixes and Testing
Even with a solid baseline, issues will arise. Direct-to-film printing troubleshooting focuses on diagnosing which variable (temperature, time, pressure, or cure) most influences the symptom and adjusting accordingly. A systematic approach helps you identify the root cause without guessing.
Adopt a controlled testing matrix: vary one parameter at a time across fabric types, film brands, and inks, then document adhesion, color vibrancy, edge fidelity, and wash performance. Calibrate with fabric-specific test swatches and build simple presets for production to improve repeatability and reduce misprints.
Frequently Asked Questions
How should I dial in DTF transfer temperature to achieve reliable results with DTF transfer settings?
DTF transfer temperature is the most influential factor in DTF transfer settings. Start around 320°F (160°C) and adjust in 5–10 degree increments based on fabric and adhesive tolerances. Always test swatches, reference the film manufacturer’s guidelines, and inspect edge adhesion and color integrity before committing to production.
How do DTF transfer time settings impact print quality under DTF transfer settings?
DTF transfer time settings control how long the adhesive bonds and how long the ink sets. Use a baseline of 12–15 seconds at 320°F, then shorten to 10–12 seconds for delicate fabrics or glossy films, or extend to 16–20 seconds for heavier fabrics, while monitoring for scorching. Pair any time adjustments with a temperature check and inspect transfer crispness and edge detail.
What are DTF pressure guidelines for consistent transfers during DTF transfer settings?
DTF pressure guidelines call for medium to firm pressure to ensure even contact across the garment and film. Use a calibrated press or pressure regulator to reproduce consistent force; check for uniform contact on textured or thick fabrics; re-test after changes in time or temperature.
What is the DTF cure process and why is it important for DTF transfer settings?
DTF cure process refers to post-press steps that set the adhesive and inks for wash durability. Include a brief rest after pressing, possibly a cold or warm rest followed by a light second pass if recommended (2–5 seconds). Use a protective sheet to prevent scorching and follow the adhesive manufacturer’s curing window for best results.
How can Direct-to-film printing troubleshooting guide me to adjust DTF transfer settings for common issues?
Direct-to-film printing troubleshooting helps identify issues that can be addressed by tweaking DTF transfer settings. Cracking or peeling after washing: increase heat slightly or extend time by 2–3 seconds and re-test. Fading colors or dull whites: verify ink coverage, ensure proper cure, and consider a small temperature increase within guidelines. Ghosting or double images: check platen alignment and increase pressure for even contact. Uneven adhesion on edges: extend dwell time or increase edge pressure, press edges with a gradient. Film lift at seams: ensure full contact at garment edges and hold during cure.
How can I calibrate DTF transfer settings across fabrics to build reliable presets?
Calibration across fabrics uses a controlled testing matrix that varies one factor at a time. Test on cotton, poly/cotton blends, and 100% polyester; run a temperature series (310°F, 315°F, 320°F, 325°F, 330°F), a time series (10–18 seconds) at a fixed temperature, and different pressure settings. Record results with notes on adhesion, color vibrancy, edge fidelity, and curling, then create fabric-specific presets (e.g., baseline 320°F, 12–15 seconds) for production.
| Aspect | Key Points |
|---|---|
| Core idea | DTF transfer settings are the heat- and pressure-based parameters that bond film-based images to fabrics—temperature, time, pressure, and cure—and must be tuned for each material to ensure crisp detail, strong adhesion, and a soft hand. |
| Four core variables | Temperature, Time, Pressure, Cure work together like a recipe: adjust one variable, and others respond; baseline guidelines exist but must be validated by testing on target fabrics and films. |
| Baseline recommendations | Start with 320°F (160°C) and 12–15 seconds with medium pressure; adjust +/- 5–10 degrees or a few seconds based on fabric and film guidelines. |
| Fabric considerations | Cotton and cotton blends tolerate higher heat; polyester and blends may require lower temperatures and shorter dwell times; fabric color, weave, and texture affect adhesion and appearance. |
| Testing and calibration | Calibrate using controlled experiments: vary one factor at a time, test fabrics (cotton, poly/cotton, 100% polyester), and record adhesion and color results to build presets. |
| Troubleshooting | Common issues include cracking/peeling, fading/dull whites, ghosting, uneven edge adhesion, and seam lifts; address by adjusting temperature, time, and/or pressure within manufacturer guidelines. |
| Post-press cure | Cure steps after pressing improve wash durability—allow rest, consider cold/warm rest periods, protective sheets, and follow adhesive manufacturer guidelines for cure windows. |
| Practical workflow | Document settings, use baseline tests, maintain equipment, replace worn silicone pads, and create fabric-specific presets for production. |
| Fabric/film pairing | Different films and adhesives have distinct heat tolerances; align settings to film recommendations and validate with swatches; some textures (velour, fleece) need gentler heat. |