
DTF transfers troubleshooting is essential for achieving reliable, long-lasting designs on textiles. When a design peels or cracks, it wastes time and materials and undermines consumer trust and your brand’s reputation. This guide focuses on DTF transfers troubleshooting to help you identify root causes, optimize your process, and apply fixes that keep transfers looking sharp wash after wash, including DTF heat press settings and DTF transfer application tips. Whether you’re a hobbyist or running a small shop, understanding how to prevent peeling and cracking will save you money and improve turnaround times. This practical overview also weaves in DTF transfer peeling, DTF transfer cracking, and a DTF troubleshooting guide to support your workflow.
Think of these challenges as adhesion performance and durability questions rather than isolated defects. What you call peeling or cracking translates into issues with bond strength, fabric compatibility, and heat transfer dynamics. LSI-friendly phrasing taps into related concepts like transfer adhesion, cure quality, and process control, which helps readers and search engines connect your material to practical remedies. By framing the topic through alternative terms such as ‘bonding reliability,’ ‘film-adhesive compatibility,’ and ‘heat press interaction with fabrics,’ you guide readers toward a broader understanding. This perspective also sets the stage for applying the concrete steps outlined in the first paragraph, while refreshing readers with diverse terminology.
DTF Transfers Troubleshooting: Diagnosing Peeling and Cracking
DTF transfers troubleshooting begins with clearly identifying the two most common failure modes: peeling and cracking. Understanding the difference helps you target the right fix and prevent recurring issues. Peeling often points to an adhesive or surface incompatibility issue, while cracking signals rigidity or uneven bonding that can worsen with use. By framing your analysis around adhesion, flexibility, and durability, you can develop a systematic approach to diagnose and address both problems simultaneously.
In practice, this means checking every stage of the process—from pre-press prep and fabric choice to heat press settings and post-press handling. Emphasize observing where the bond tears or where cracks form, as that will guide adjustments to the DTF transfer peeling and cracking dynamics. A structured troubleshooting mindset, sometimes summarized in a DTF troubleshooting guide, helps you move from guesswork to repeatable improvements that keep designs vibrant wash after wash.
DTF Transfer Peeling: Root Causes and Prevention
Peeling is typically driven by factors such as inadequate pre-press, moisture in the fabric, or improper curing that leaves an imperfect bond. Wrinkles, residual fibers, or poor surface preparation can create air pockets that reduce adhesive contact and promote edge lift over time. Recognizing these root causes allows you to tailor your workflow, choosing appropriate fabrics, films, and adhesives that work together to resist peeling.
Prevention hinges on consistent material testing and process controls. Document your fabric-adhesive combinations, ensure high-quality transfer film, and verify that the backing and adhesive are compatible with the garment type. Correct pre-press, controlled heat, and careful post-press cooling are essential parts of your DTF transfer application tips that minimize peeling across batches and ensure durable results.
DTF Transfer Cracking: Flexibility, Bond Integrity, and Film Quality
Cracking occurs when the transfer film is too rigid or the bond lacks uniform adhesion, allowing the image to fracture under stress, washing, or bending. Contributing factors include insufficient curing, overly thick or stiff adhesive, or misaligned layers that don’t flex evenly with the fabric. Addressing cracking requires balancing film thickness, adhesive formulation, and substrate compatibility so that the design remains flexible without sacrificing adhesion.
A practical fix involves selecting appropriate materials and adjusting application parameters to improve bond integrity. Testing on representative fabrics, refining the heat transfer profile, and ensuring consistent post-press handling help mitigate cracking. When you optimize DTF heat press settings and film choice in tandem, you create more durable transfers that resist cracking through regular wear.
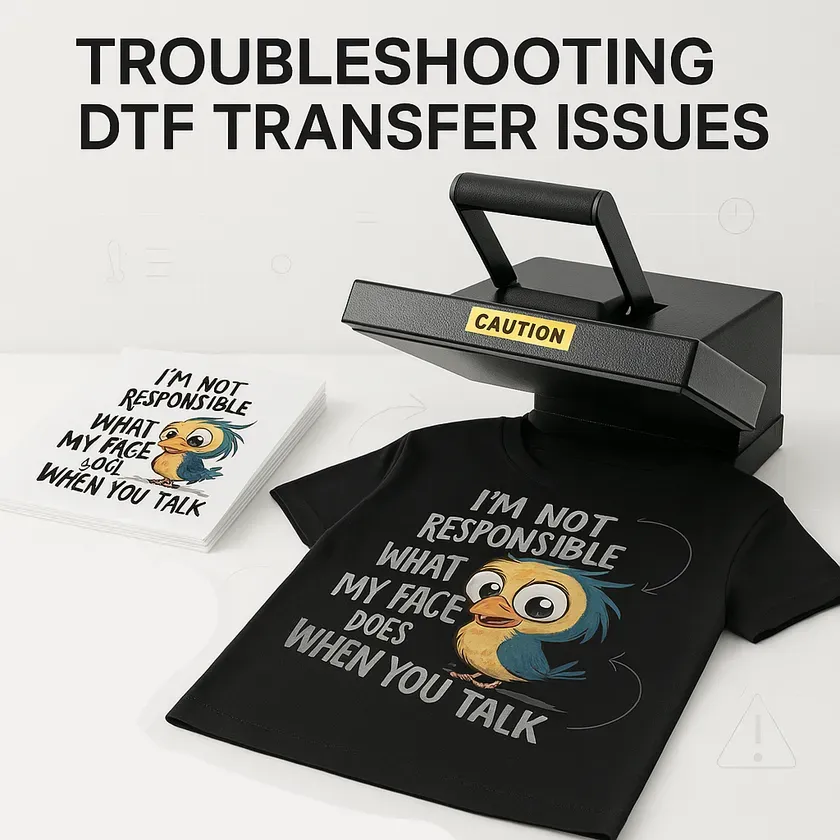
DTF Heat Press Settings: Finding the Right Balance for Durability
Calibration of temperature, time, and pressure is a core element of successful DTF transfers. Start with practical baselines—typically around 160–170°C (320–338°F), 10–15 seconds of dwell, and medium to firm pressure—and adjust based on fabric type, adhesive, and film. This iterative approach helps you converge on settings that maximize adhesion while preserving the garment’s flexibility.
Beyond numbers, ensure even contact across the entire design. Use a flat platen, consider pressing pillows for multi-layer items, and verify that the press maintains stable temperature throughout the cycle. Post-press handling, including a brief cooldown, also plays a role in bond formation and longevity, underscoring the relevance of precise DTF heat press settings for durable results.
DTF Transfer Application Tips: Best Practices for Long-Lasting Prints
Application tips are your frontline defense against peeling and cracking. Emphasize precise alignment, a controlled workflow, and protective layers to distribute heat evenly. A well-executed transfer sits flat from edge to edge, reducing localized stress that can lead to peeling at the margins. These routines are a practical embodiment of DTF transfer application tips that encourage consistency.
Use high-quality materials and maintain clean equipment to keep adhesion reliable. Align with test results on similar fabrics and colors to gauge performance in real-world conditions. Regular maintenance—clean release liners, non-stick sheets, and calibrated heat presses—helps sustain bond quality and durability, reinforcing the importance of good application practices for lasting designs.
DTF Troubleshooting Guide: Quick Diagnostics and Next Steps
A practical troubleshooting guide for DTF transfers combines quick diagnostics with a disciplined approach to adjustment. Start with a lightweight checklist: confirm fabric prep, inspect transfer quality, verify heat press settings, and review post-press handling. By applying a methodical diagnostic routine, you can isolate variables that contribute to peeling or cracking and chart a path to reliable fixes.
As you iterate, document your test results and adjust one variable at a time. Compare outcomes across fabrics, films, and adhesives, and keep a running log of what works best. This living approach to the DTF troubleshooting guide ensures you continually refine your process, improve yield, and deliver consistent, durable results.
Frequently Asked Questions
What causes DTF transfer peeling and how can I prevent DTF transfer peeling?
DTF transfer peeling happens when the adhesive bond to the fabric is too weak or disrupted by improper pre-press, curing, or washing. To prevent it, pre-press the fabric to remove moisture and flatten fibers; use a compatible film and adhesive for the fabric; ensure even pressure and accurate temperature with a calibrated press; allow a brief cooldown after pressing; test on similar fabrics before full runs; and use a protective layer to promote even heat distribution.
How can I diagnose DTF transfer cracking and what fixes work best?
DTF transfer cracking occurs when the film or adhesive is too rigid or hasn’t bonded evenly, and can be worsened by heat, moisture, or friction after application. Fixes include using a more flexible film or adhesive, ensuring proper cure by adjusting temperature, time, and pressure for the specific fabric, and applying heat evenly. Re-test on the target fabric and adjust details like dwell time or temperature based on results.
What is the DTF troubleshooting guide for common transfer problems?
A practical DTF troubleshooting guide starts with solid pre-press and fabric prep, followed by checking heat press settings (temperature, time, and pressure) against manufacturer guidelines. Confirm material compatibility, inspect post-press handling and cooling, and verify care and washing instructions. Use a quick checklist on each job to identify where peeling or cracking may be occurring and adjust one variable at a time.
What are recommended DTF heat press settings for common fabrics?
Typical starting points for DTF heat press settings are 160–170°C (320–338°F) for 10–15 seconds with medium to firm pressure. Adjust slightly for thicker fabrics or complex designs and always follow the film and adhesive supplier guidelines. After pressing, allow a 5–10 second cooldown before removing the carrier if hot-peel is recommended.
What are some DTF transfer application tips to improve adhesion and durability?
DTF transfer application tips include aligning the design precisely, following a consistent workflow (pre-press, apply, press, and cooldown), using protective layers to distribute heat, maintaining clean non-stick surfaces, and testing on similar fabrics first. Invest in quality film and adhesive, and calibrate the heat press regularly to maintain consistent results across jobs.
How does DTF transfers troubleshooting address post-press handling and washing issues that cause peeling or cracking?
DTF transfers troubleshooting for post-press handling and washing focuses on proper cooldown, following care guidelines, and minimizing aggressive washing in the initial wears. It also emphasizes consistent post-press processes, using appropriate curing times, and instructing customers on gentle cycles and suitable detergents. If issues persist, adjust one variable at a time and re-test to identify the root cause.
| Topic | Key Point |
|---|---|
| Introduction | DTF transfers troubleshooting aims for reliable, long-lasting designs by identifying root causes, optimizing the process, and applying fixes to prevent peeling and cracking. |
| Understanding the Problem: Peeling vs Cracking | Peeling is weak adhesion; cracking indicates rigidity or uneven bonding after heat exposure. Both require targeted fixes and attention to adhesion, flexibility, and durability. |
| Root Causes | Common causes include improper pre-press, incorrect heat press settings, material mismatch, and post-press handling. |
| DTF Transfer Setup | Focus areas: fabric prep, transfer quality, equipment calibration, and work environment. |
| Heat Press Settings | Temperature ~160–170°C (320–338°F), time ~10–15 seconds, medium to firm pressure, and consistent post-press handling. |
| Application Tips | Align precisely, follow a consistent workflow, use protective layers, maintain equipment, test on similar fabrics. |
| Fixes for Peeling and Cracking | Inspect, re-adhere or re-transfer, improve cure with cooldown, reinforce edges, check fabric compatibility, reduce wash stress. |
| Preventive Practices | Build prevention into routine: tested material combinations, quality materials, calibrated heat press, and a fall-back plan. |
| DTF Troubleshooting Checklist | Verify fabric prep, transfer quality, heat press settings, post-press handling, and washing guidelines. |
| Conclusion | DTF transfers troubleshooting is an ongoing process of testing, refining, and applying best practices to deliver durable transfers and protect brand reputation. |
Summary
DTF transfers troubleshooting is a structured, ongoing process that blends careful analysis with hands-on adjustments to deliver durable, vibrant designs. By refining pre-press steps, ensuring proper heat-press calibration, choosing compatible materials, and enforcing sound post-press care, you reduce peeling and cracking and improve consistency across runs. Treat it as a living workflow—document outcomes, test on similar fabrics, and adapt methods to different transfer films to build a reliable, trusted brand or project.