
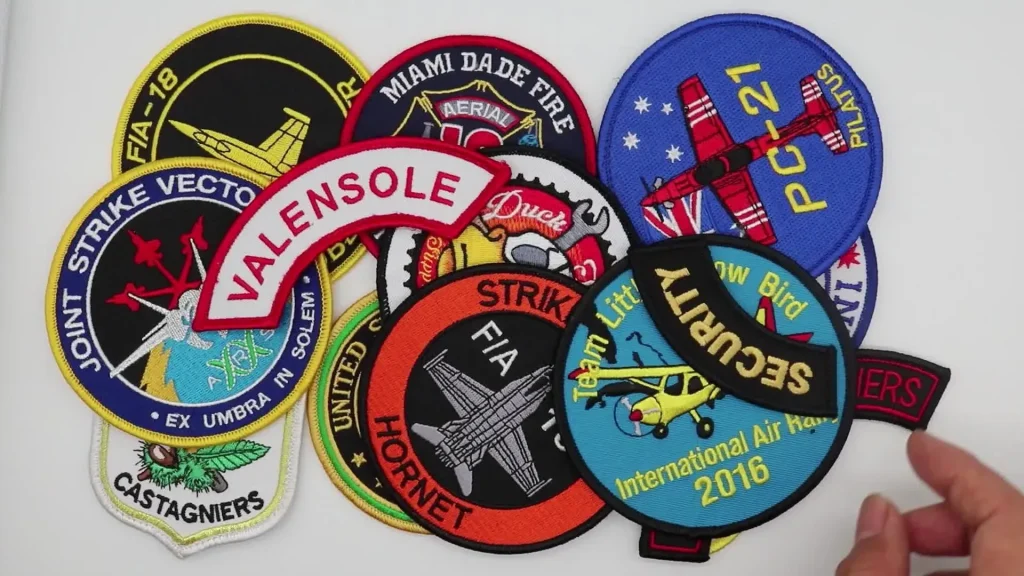
Custom Embroidered Patches provide a powerful way to broadcast a team, club, or brand identity across uniforms, merchandise, and gear, making a memorable impression at events and competitions. From a simple logo to intricate artwork, these patches bring durability, versatility, and a tactile way to showcase a name, message, or symbol, while resisting wear, washing, and exposure to the elements across uniforms and accessories. If you’re exploring designing embroidery patches, you’ll find that careful design decisions impact legibility and production feasibility, including size, shape, color management, and stitch density across fabrics. Understanding the patch production process helps you plan timelines, costs, and quality checks while choosing iron-on vs sew-on patches, ensuring compatibility with your fabric, laundering expectations, and end-use durability. With clear guidance on custom patch pricing and tips for applying patches to fabrics, you can plan for successful, long-lasting branding that scales from small team rosters to large corporate programs.
Think of these fabric embellishments as badge designs, embroidered emblems, or branded insignias stitched onto apparel. They function as durable identifiers that reinforce team identity, corporate branding, or personal style, while offering flexible backing choices and a clean appearance. In LSI terms, related concepts include textile patches, sewn badges, heat-activated patches, and fabric-compatible adhesives, which help search engines connect topics like logo adornments and garment decoration. When selecting these fabric patches, consider backing material, edge finishes, durability, and care instructions to ensure they perform well in washing and daily wear.
Designing Embroidery Patches: From Concept to Clear Specs
Designing embroidery patches begins with a clear concept that translates to stitched reality. When you design, consider size, shape, and color scheme as the foundation for legibility and production feasibility. The process of designing embroidery patches should balance visual impact with practical constraints, ensuring edges, borders, and key details won’t be lost in trimming or stitching. Early design choices set the stage for smoother digitizing and fewer revisions later.
Artwork preparation and digitizing translate your concept into actionable stitch instructions. Convert artwork to vector outlines, simplify gradients, and separate colors so embroidery machines can reproduce the design accurately. Pay attention to text readability, color management, and layering density; use Pantone references to guide thread colors while recognizing that embroidery has a different optical effect than print. Thoughtful design reduces the need for revisions during the patch production process.
The Patch Production Process: A Step-by-Step Roadmap
The patch production process starts with design approvals and ends with finished patches ready for backing and packaging. After you approve the artwork, a skilled digitizer creates stitch files, selecting satin edges for outlines and fill stitches for larger areas. A digital proof or small sample helps verify density, color transitions, and overall balance before any embroidery begins.
In practice, clear communication with a trusted vendor streamlines the patch production process. Expect defined timelines, revision limits, and the opportunity to test a prototype on fabric similar to your final garment. This upfront testing reduces surprises when scaling from a single patch to thousands and helps ensure durability across wear.
Backing and Materials: Choosing Iron-On vs Sew-On and More
Backing and materials determine how patches attach and how well they wear. Sew-on patches require stitching to the garment, while iron-on patches use heat-activated adhesive to bond to fabric. For versatility, Velcro-backed patches offer removable attachment on items like varsity jackets. When evaluating iron-on vs sew-on patches, consider fabric type, laundering expectations, and wear duration to choose the best option.
Stabilizers, fabrics, and edge finishes also influence the patch’s look and durability. Options like twill, felt, or fabric blends affect drape and wash resistance, and stabilizers (tear-away, cut-away, or fusible) help maintain shape on stretchy or loosely woven fabrics. The backing choice should align with how the patch will be applied and how often the garment is laundered, which matters for applying patches to fabrics across a uniform collection.
Costs and Turnaround: Custom Patch Pricing Explained
Pricing for patches is driven by size, quantity, stitch count, color complexity, backing type, and finish. This is where custom patch pricing comes into play: larger runs lower per-unit costs due to setup efficiency, while small runs may incur higher per-unit pricing but allow experimentation with different sizes or designs. Understanding these factors helps teams budget effectively without sacrificing quality.
Careful planning helps control costs and timing. More colors and finer details increase digitizing and stitching time, and rush orders typically carry a premium. By aligning design choices with production realities, you can optimize quality while staying within budget, and explore options like different backing or finish to achieve the best value for your project.
Application and Care: Applying Patches to Fabrics and Maintaining Longevity
Applying patches to fabrics requires selecting the right method for the intended use. Iron-on patches bind with heat, while sew-on patches rely on stitching for long-term durability; choosing the correct backing depends on fabric type and washing habits. For multi-use items, Velcro-backed patches provide interchangeability, and the choice between iron-on and sew-on should reflect how often the item will be washed and worn.
Care and maintenance extend patch life. Follow washing guidelines, turn patches inside out if possible, and avoid high heat in dryers that can loosen adhesives or weaken threads. Proper storage and occasional re-stitching or reattaching with a new backing can keep patches looking sharp for years, preserving color fidelity and edge finish across multiple wash cycles.
Best Practices for Consistent Branding with Custom Embroidered Patches
Using Custom Embroidered Patches as a branding tool requires consistent design rules and color management. Define color palettes with Pantone references, specify safe margins, and test legibility at multiple sizes to maintain identity across products. These practices ensure each patch communicates the same message, whether on jerseys, jackets, or bags, reinforcing a unified brand aesthetic.
To scale without compromising quality, align your design, digitizing, and production steps into a repeatable process. Emphasize the patch production process in vendor conversations, request proofs, and validate color and density on fabric swatches before full runs. Focus on consistency in edge finishes, backing selection, and packaging to deliver reliable, on-brand patches every time.
Frequently Asked Questions
What are Custom Embroidered Patches and how do they relate to designing embroidery patches?
Custom Embroidered Patches are durable fabric patches that display a logo, artwork, or message through stitched embroidery. They’re a popular branding and identity tool for teams, clubs, businesses, and hobbyists due to their tactile quality and long wear. In designing embroidery patches, you plan size, shape, color, and legibility before translating the concept into production-ready artwork for digitizing.
What is the patch production process for Custom Embroidered Patches?
The patch production process typically starts with design approvals, then digitizing and proofing to test stitch layouts. The patch is embroidered on the chosen backing, backing is attached, and the patch is cut to shape with edge finishes. Finally, patches undergo finishing and quality control, followed by packaging and shipping.
Iron-on vs sew-on patches for Custom Embroidered Patches: how do you choose?
Iron-on patches use a heat-activated adhesive for quick bonding, offering convenient, removable branding but adhesion can vary by fabric and laundering. Sew-on patches are stitched directly to fabric for durable, long-lasting attachment—ideal for uniforms and high-wear items. Choose based on fabric type, washing routine, and whether you need a removable option like Velcro.
How is custom patch pricing determined for Custom Embroidered Patches?
Pricing for Custom Embroidered Patches depends on size, quantity, stitch count, color complexity, backing type, and finish. Larger runs reduce per-patch costs due to setup efficiency, while small runs may have a higher per-unit price. Complexity and rush timelines can further impact the overall cost.
How do you applying patches to fabrics for Custom Embroidered Patches?
Patches can be applied using iron-on heat-activated adhesive, sew-on stitching, or Velcro for interchangeable use. For iron-ons, follow heat-setting instructions and test adhesion on the fabric before full application. For sew-ons, stitch around the patch edge securely, and consider fabric type and washing habits to maximize longevity.
What design considerations should you focus on for Custom Embroidered Patches?
Key design considerations include vector-based artwork, appropriate size and shape, and text readability with high-contrast colors. Manage color with Pantone references and choose a suitable border finish (merrow, laser-cut) for durability. Plan stitch density with underlay, and simplify gradients and fine details to ensure clean stitching in production.
| Aspect | Key Points |
|---|---|
| Design considerations |
|
| Digitizing and artwork preparation |
|
| Materials and backing options |
|
| Production process from concept to finished patch |
|
| Size, quantity, and pricing considerations |
|
| Applications and care tips |
|
| Common mistakes and how to avoid them |
|
| Industry use cases and inspiration |
|
Summary
Conclusion: Custom Embroidered Patches offer a robust way to communicate identity, values, and stories across teams, clubs, businesses, and hobbyists. By focusing on thoughtful design, precise digitizing, careful material choices, and appropriate backing and finishing, you can produce patches that look great, wear well, and serve your branding needs for years. Whether you’re exploring design ideas for designing embroidery patches, planning the patch production process for a team, weighing iron-on vs sew-on options, calculating custom patch pricing, or deciding how best to apply patches to fabrics, a structured approach ensures success. Embrace the process, test your designs, and choose the right partners to bring your patch vision to life with precision and quality.