
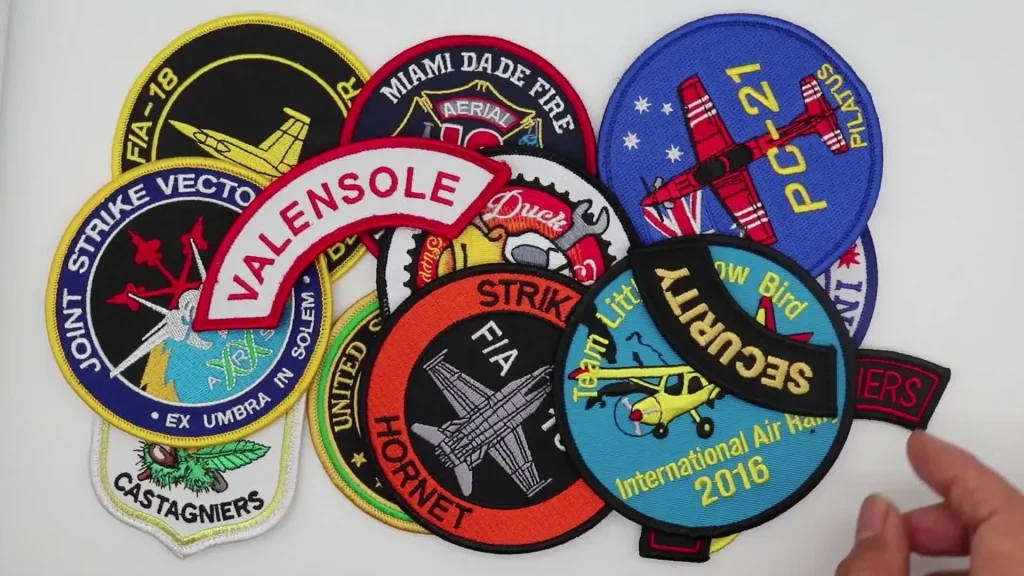
Custom Embroidered Patches open a world where simple ideas become wearable art, blending creativity with precise stitching. Whether you’re exploring DIY embroidered patches or seeking patch design ideas to inspire a collection, this guide blends design thinking with practical techniques. You’ll learn how to translate a sketch into a durable patch and how to make patches using embroidery patch techniques, stitch choices, and backing selections. From bold silhouettes to clean edges, the process emphasizes readability at small sizes and a cohesive color story. By the end, you’ll have a clear path from concept to finished patches that look vibrant, professional, and ready for application.
Viewed through a broader lens, these are stitched badges, embroidered emblems, or fabric patches that add personality to jackets, bags, and uniforms. Whether you call them iron-on patches, sew-on patches, or decorative patches, the core idea remains the same: durable, visually appealing textile adornments. By using related terms such as textile patches, embroidery badges, and sewn-on insignias, designers satisfy LS I-friendly searches while expanding the creative vocabulary. With this semantic approach, you can explore a spectrum of design ideas, stitch techniques, and finishing options that suit a range of fabrics and applications.
From Idea to Patch: Essential Patch Design Ideas for DIY Embroidered Patches
Turning a spark of an idea into a finished patch begins with clear shapes and legible details. For DIY embroidered patches, start with patch design ideas that read well when scaled down and stitched. Bold silhouettes, high contrast, and simple motifs translate reliably to embroidery and help your patches capture attention quickly.
Consider color palettes, readability, and how each element will be stitched. Keep fine details large enough to sew, and plan the design so it remains recognizable from a short distance. These design principles are the foundation of successful patches in the world of embroidery, helping you go from concept to patch design that shines when worn or collected.
Custom Embroidered Patches: Turning Concepts into Wearable Art
Custom Embroidered Patches can turn a concept into wearable art. Begin with a design brief that translates into embroidery-friendly art, balancing personality with practicality. Personalization adds perceived value and makes your patches stand out in a crowded market.
Plan for durability and finishing from the start. Decide on backing options, edge treatment, and how the patch will be applied, so the final piece remains vibrant and secure over time. This approach shows how to make patches that perform as well as they look.
From DIY to Pro: The Core Steps to How to Make Patches
From concept to file: the core steps that move you from DIY ideas to professional results. Start with a concept and design that can be digitized for machine embroidery, then choose stitch types that suit each element. Asking how to make patches begins with a clear workflow and a mockup to preview readability.
Digitizing or converting artwork creates the stitch file you’ll stitch out. Decide on satin, fill, run, or backstitch for each area, and preview the design to check density, balance, and legibility before you sew. This step encapsulates the embroidery patch techniques that separate good patches from great ones.
Materials, Tools, and Backing for High-Quality Patches
Materials begin with stabilizers, fabrics, threads, and backing that match your durability needs. Tear-away stabilizers work well for dense designs, while cut-away stabilizers are better for heavier fabrics that wear longer.
Choose fabrics such as twill or canvas for stability, and select high-quality polyester or rayon threads for colorfast results. Backing options like iron-on or sew-on can affect usability, while a merrowed edge provides a clean, professional finish.
Embroidery Patch Techniques: Stitches, Edges, and Color Management
Embroidery patch techniques define how patches look and hold up. Pay attention to stitch types and density: satin stitches outline details and fine lines, while fill stitches cover larger areas. Maintain balanced density to avoid fabric show-through.
Color management and edge finishing go hand in hand. Plan a palette with strong contrast and test on similar fabrics to ensure readability. Proper transfer and alignment ensure the patch sits correctly on garments or accessories.
Care, Longevity, and Real-World Applications of Your Patches
Care and longevity start with proper washing, drying, and ironing practices. Turn garments inside out, use gentle cycles, and avoid high heat that can weaken threads and edge finishing.
Apply patches to a range of real-world items—bags, hats, uniforms, and upcycling projects. Proper care and durable backing extend their life, while everyday use demonstrates the practical appeal of patches in fashion, branding, or fundraisers.
Frequently Asked Questions
What are the essential steps to get started with Custom Embroidered Patches?
Getting started with Custom Embroidered Patches means turning your idea into embroidery-ready art. Follow these steps: concept and design, digitizing or converting artwork into a stitch file, selecting stabilizers, fabrics, and threads, hooping and setting stitch density, and applying your chosen backing and edge finish. If you’re new to DIY embroidered patches, start simple and use a basic patch design ideas set to learn how to make patches.
What patch design ideas work best for Custom Embroidered Patches?
Great patch design ideas for Custom Embroidered Patches include bold silhouettes, monograms and initials, nature-inspired motifs, simplified icons, and theme collections. Make sure the design reads clearly at small sizes by using high-contrast outlines and minimal fine detail. Design ideas should align with embroidery patch techniques to maintain legibility and a polished finish.
What materials and tools do I need for high-quality Custom Embroidered Patches?
For professional results in Custom Embroidered Patches, assemble stabilizers (tear-away for dense designs, cut-away for heavy fabrics), fabrics like twill or canvas, high-quality polyester or rayon threads, suitable backings (iron-on or sew-on), and a merrow edge for a clean border. Don’t forget an embroidery machine, sharp scissors, thread snips, and a cutting mat to streamline the process. These essentials support reliable DIY to pro-level results.
How do embroidery patch techniques affect durability of Custom Embroidered Patches?
Embroidery patch techniques determine durability through stitch types, density, color management, and edge finishing. Use satin stitches for outlines and fill stitches for larger areas, keeping density balanced to avoid puckering. A merrowed edge or equivalent edge finishing, plus proper backing, enhances longevity and keeps patches looking crisp over time.
What are common mistakes when making Custom Embroidered Patches and how can I avoid them?
Common mistakes in Custom Embroidered Patches include overly dense stitching, inconsistent tension, poor color contrast, inadequate backing, and skipping edge finishing. To avoid these issues, regularly calibrate your machine, test tension with sample patches, choose high-contrast thread colors, match backing to patch size and fabric, and apply a clean edge finish for durability.
How should I apply and care for Custom Embroidered Patches across different fabrics?
When applying Custom Embroidered Patches, choose the backing that fits the fabric and use iron-on, sew-on, or hook-and-loop methods as appropriate. For care, wash garments inside-out on a gentle cycle, air-dry when possible, and use low heat if ironing is needed with a cloth barrier to protect the patch. Proper care helps patches made with embroidery patch techniques stay vibrant on various fabrics.
| Topic | Key Points |
|---|---|
| Introduction | Turning ideas into wearable art; journey from sketch to Custom Embroidered Patches; practical steps, design thinking, and patch techniques to produce durable, vibrant patches that tell a story. |
| Design Ideas | – Bold silhouettes; – Monograms/initials; – Nature motifs; – Pop culture/brand icons; – Theme collections. |
| From DIY to Pro: Core Steps | 1) Concept & design; 2) Digitizing/stitch choices (satin, fill, run, backstitch); 3) Materials selection; 4) Hoop & stitch settings; 5) Finishing & backing. |
| Materials & Tools | Stabilizers; Backing options (iron-on, sew-on, merrowed edge); Fabrics (twill/canvas); Threads; Backing materials (fusibles, adhesives); Tools (machine, scissors, snips, cutting mat). |
| Techniques | Stitch types & density; Color management; Edge finishing (merrow); Backing & stability; Transfer & alignment. |
| Step-by-Step Process | Step 1– Finalize design; Step 2– Digitize; Step 3– Prepare materials; Step 4– Hoop properly; Step 5– Run embroidery; Step 6– Trim/finish; Step 7– Attach backings & finalize. |
| Common Mistakes | Overly dense stitching; Inconsistent tension; Poor color contrast; Inadequate backing; Skimping on edge finishing. |
| Real-World Ideas | Apparel customization; Event merch; Club/team branding; Upcycling/sustainability. |
| Care & Longevity | Washing (gentle cycle), Drying (air or low heat), Ironing (low heat, use cloth), Storage (store flat) to preserve patches. |
Summary
Conclusion: From DIY to pro-quality patches, the journey blends creativity with technique to deliver lasting, vibrant Custom Embroidered Patches.