
DTF printing tips can dramatically improve the look and durability of printed t shirts, helping shops deliver professional finishes, reduce reworks, and build consistent production standards from order to order, while also helping control costs by reducing waste, speeding production, and enabling confident scaling as demand grows. A strong DTF workflow guides every step from digital design through film preparation, calibration, transfer, and post-press checks, ensuring repeatability, saving time, and maintaining color accuracy across batches and fabric types, as well as simplifying training and quality audits. Advances in DTF film quality and adhesive powders matter because they influence edge sharpness, texture, wash durability, and overall garment feel, with higher-quality film yielding crisper details and more even transfers across diverse fabrics, including blends and heavier cottons. Getting the heat press settings for DTF right is crucial to balance adhesion with hand feel, while color vibrancy techniques—such as calibrated ink density, proper underbase management, and post-transfer finishing—keep designs vivid on light and dark substrates, and they support consistent results under varying lighting. Equally important is DTF ink curing, which ensures the print remains vibrant after multiple washes by properly curing white ink layers and color channels, reducing cracking, and improving wash-fastness in real-world wear tests, while regular curing trials help sustain durability.
In plainer terms, the same subject can be understood through the direct-to-film transfer workflow, focusing on media selection, color management, and heat application. Considerations include film quality, adhesive powders, pigment balance, underbase strategies, and the timing of the press to achieve consistent color reproduction. LSI-friendly terms to weave in include media selection, substrate compatibility, color management, curing techniques, and post-transfer finishing, all contributing to durable, vibrant results across garments. By framing the process in these terms, readers can apply the same principles even when tooling or fabrics vary, strengthening overall workflow efficiency.
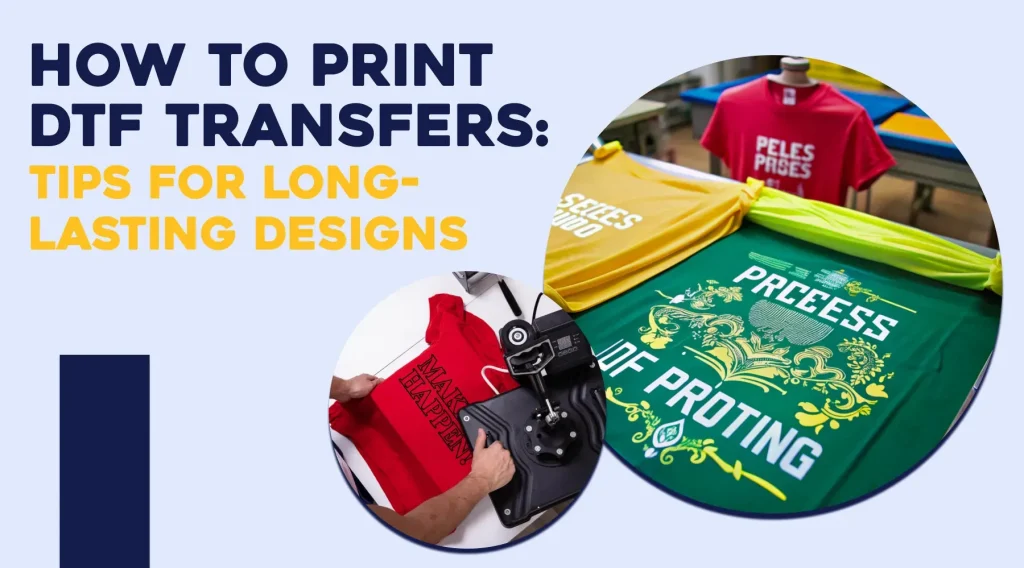
DTF printing tips for higher-quality t-shirts
Effective DTF printing tips begin with a holistic approach to the entire process, from film selection to final curing. By prioritizing reliable materials, precise design preparation, and consistent production steps, you can achieve sharper details and balanced color across every shirt. This descriptive overview emphasizes how small choices—from the DTF film to the adhesive powder—impact overall print quality and durability.
A well-structured workflow helps reduce variability between batches. Focus on garment prep, printer calibration, white underbase planning, and controlled heat transfer timing to lock in color vibrancy and edge definition. When these elements align, the result is a professional finish that stands up to washing and wear while maintaining a soft hand feel.
DTF film quality and material selection for best results
Choosing high-quality DTF film and compatible adhesive powder is foundational to successful transfers. Film quality influences color transfer accuracy, edge crispness, and surface sheen, while the adhesive powder affects how evenly the image bonds to the fabric. Prioritize films known for tear resistance and consistent particle adherence to minimize edge cracking or specks after washing.
Material selection should consider the fabric type and printing device, following manufacturer guidelines to pair film, powder, and inks. A careful evaluation of film quality, powder chemistry, and ink compatibility helps optimize tireness, reduces rework, and supports a more predictable DTF workflow across different apparel projects.
DTF workflow optimization: streamline from design to transfer
A streamlined DTF workflow reduces waste and accelerates production without sacrificing quality. Start with design for DTF that anticipates white underbase requirements and color separations, then move into calibrated printing and accurate powder application. Integrating these steps into a cohesive process supports color management, accurate placement, and predictable transfer results.
Keep a reproducible log of printer profiles, ink sets, film batches, and environmental conditions to track what works best over time. By aligning design, printing, curing, and post-press handling under a clear DTF workflow, you can minimize color drift, preserve vibrancy, and maintain consistency across runs.
Heat press settings for DTF: achieving durable transfers
The right heat press settings are essential to durable transfers. Typical ranges land around 160–170°C with a press time of roughly 12–20 seconds, depending on fabric and film. Apply firm, even pressure and protect the print with a silicone sheet or Teflon cover to prevent heat damage and halo effects.
Always test settings on scrap garments to dial in the optimal combination for your equipment and materials. Variables such as fabric weave, film thickness, and ambient conditions can shift results, so document the best settings and apply them consistently across similar jobs to maintain color fidelity and edge clarity.
Color vibrancy techniques for DTF prints
Maintaining color vibrancy requires deliberate color management and layering strategies. Use a deliberate white underbase on dark fabrics and carefully separated color layers to achieve bright, consistent hues. Incorporate color management practices to ensure that the final print remains vivid across different garment colors and wash cycles.
Employ calibration routines and ICC profiles that reflect your printer, inks, and film. Fine-tuning ink density and ensuring accurate color reproduction helps preserve the intended hue, saturation, and contrast. These color vibrancy techniques are central to producing apparel that pops on retail shelves and online catalogs alike.
DTF ink curing and post-process care
DTF ink curing is a critical step that affects wash durability and image longevity. Proper curing activates the adhesive and secures the ink matrix to the fiber, reducing cracking and peeling after multiple washes. Caring for the print during post-processing helps maintain color integrity and texture.
Implement controlled cooling and careful handling after transfer to minimize micro-cracking and surface marking. A light final press with a protective sheet can set the finish without overexposing the print to heat. Regular maintenance of the printer, including nozzle checks and periodic firmware updates, supports consistent DTF ink curing and reliable results across runs.
Frequently Asked Questions
How can optimizing the DTF workflow improve DTF film quality and color vibrancy techniques?
Optimizing the DTF workflow involves standardizing film and adhesive choices, regular printer calibration, and design preparation for white underbase and color separation. Use consistent ink sets and run test prints on the same garment type to maintain color vibrancy across batches.
How does DTF film quality impact DTF ink curing and print durability?
DTF film quality directly affects color transfer, edge definition, and surface shine, which influence how evenly the ink cures and how durable the print remains after washing. Select high-quality film and adhesive compatible with your inks, then follow curing guidelines to avoid texture or cracking.
What heat press settings for DTF yield the best adhesion and color stability across fabrics?
Use a transfer temperature around 160–170°C for 12–20 seconds with firm, even pressure. Adjust for fabric type and film, and test on a scrap garment before a full run.
Which color vibrancy techniques should I use to maximize bright, durable colors in DTF prints?
Apply color management, ensure a strong white underbase on dark fabrics, and optimize ink density and color separations. Calibrate printers and run test prints to preserve color vibrancy across lighting conditions.
How can I optimize DTF ink curing to ensure consistent color and avoid cracking?
After printing and powdering, cure according to manufacturer guidelines to activate the adhesive without overheating. Ensure even, thorough curing and avoid overheating which can cause color shifts or cracking; document curing times for consistency.
How do I benchmark and optimize the DTF workflow to reduce rejects and improve edge sharpness?
Create a repeatable protocol: standardize settings, keep a log of profiles, run regular test prints on the same garment type, and perform in-process quality checks for edge sharpness. This helps reduce rejects and ensure consistent results across runs.
| Tip | Key Point | Focus Area | Benefit |
|---|---|---|---|
| Introduction | DTF printing tips can dramatically improve the look and durability of printed t shirts. Direct to film printing has gained popularity due to its versatility, vibrant color reproduction, and compatibility with a broad range of fabrics. However, achieving consistently high quality results requires attention to detail across the entire workflow. In this guide we present Top 10 DTF printing tips designed to boost t shirt quality and color vibrancy. These tips cover materials, design preparation, printer settings, pressing, curing, and quality control, so you can streamline your process and deliver professional results. | Overview | Sets expectations for quality and workflow across the project. |
| Tip 1 | Start with high quality film and adhesive powder. Choose a reliable DTF film and adhesive powder that are compatible with your printer and inks. Film quality matters because it affects color transfer, edge definition, and shine. High quality film typically yields crisper details, better tear resistance, and fewer issues during peel. Combined with good adhesive powder, it helps the printed image bond to the fabric more evenly, reducing flaking or cracking during washing. Use manufacturer guidelines to select the right combination for your fabrics and printing device. | Materials & Process | Improves transfer quality, edge clarity, and durability of the print. |
| Tip 2 | Use reliable DTF inks that deliver full CMYK coverage and white when needed. Calibrate your printer regularly for color accuracy and repeatability. Run test prints on the same type of garment you plan to use. A well calibrated printer reduces color drift and helps you maintain color vibrancy across batches, which is essential for professional grade apparel. Keep a log of ink sets, printer profiles, and environmental conditions to track what works best over time. | Ink & Calibration | Ensures consistent color and reliability across batches. |
| Tip 3 | Design for DTF with proper white underbase and color separations. When designing for DTF, plan your white channel strategically for dark fabrics and the color layers for vibrant hues. Ensure your design includes sufficient bleed and padding to cope with edge irregularities during transfer. Proper color management helps achieve color vibrancy that stands out on t shirts. Organize layers so that white coverage is balanced and the final image does not look muddy after transfer. | Design & Color Management | Improves vibrancy and clarity on fabrics; reduces muddiness. |
| Tip 4 | Print at the right resolution and settings. A resolution of 300 to 600 dpi is common for DTF prints. Use the appropriate print mode and adjust ink density to avoid oversaturation that can lead to bleeding. High resolution avoids fuzzy edges and helps preserve fine line work. Remember that the film and powder will affect the final softness, so balance sharpness with hand feel. Test a few designs on a sample garment to fine tune settings before a full run. | Resolution & Settings | Sharp edges, color accuracy, and balanced hand feel; fewer misprints. |
| Tip 5 | Pre press and garment preparation is essential. Before printing, pre press the garment for a short time to remove moisture and wrinkles. This helps align the transfer more accurately and improves adhesion. A clean, crease free surface leads to more consistent results and better color reproduction. Use a heat press or flat iron to smooth the fabric and remove moisture from the area where the image will be applied. Keep the garment flat during the transfer to avoid shifts in alignment. | Pre-press & Preparation | Improves alignment and color reproduction; enhances adhesion. |
| Tip 6 | Apply the adhesive powder correctly and cure it. After printing, apply a thin, even layer of adhesive powder according to the manufacturers guidelines. Excess powder can cause halo effects or clumping. Use a gentle shake to distribute evenly and cure properly to activate the adhesive before you transfer. Ensure the powder is evenly spread and allow any excess to fall away before curing. A smooth powder layer supports even adhesion and reduces texture artifacts on the final print. | Adhesive Powder & Curing | Even adhesion; reduced texture and halo issues. |
| Tip 7 | Use the right heat press settings for DTF. The transfer press temperature commonly ranges around 160 to 170 degrees Celsius, with a pressing time of 12 to 20 seconds depending on fabric and film. Apply firm even pressure. Using too low temperature can result in poor adhesion while too high can degrade the print. Test on scrap garments to dial in the best settings for your equipment. Use a silicone sheet or Teflon press sheet to protect the print and garment from direct heat exposure where needed. | Heat Press Settings | Proper adhesion without heat damage; tests to fine-tune. |
| Tip 8 | Peel at the right moment for best results. Peel while warm or hot is common for DTF films, but some materials may require a cold peel for optimal finish. Check the film instructions and perform a few tests to determine the best approach. Consistent peeling helps avoid distortion and preserves color vibrancy. Note that heat can affect the final color, so plan your post press handling accordingly. | Peel Timing | Prevents distortion; preserves color vibrancy. |
| Tip 9 | Post press handling and cooling for durability. After transfer, keep the garment flat and allow it to cool naturally before handling further. Cooling helps reduce micro cracking and improves wash durability. If you need to stack shirts, place a clean sheet between items to prevent surface marks. You can also perform a light final press with a silicone sheet for an extra moment to set the finish without overexposing the print to heat. | Post-press Handling | Improves wash durability; reduces surface marks. |
| Tip 10 | Cleanliness and ongoing maintenance drive consistency. Keep the printing area clean and dust free to avoid contamination that can affect color accuracy. Regular maintenance, including nozzle checks, platen cleaning, head cleaning if necessary, and firmware updates, improves reliability and color fidelity across runs. Document settings that work well for different fabrics and designs so you can reproduce results quickly in future projects. | Maintenance | Improves reliability and color fidelity across runs. |
Summary
DTF printing tips can dramatically improve t-shirt quality and color vibrancy, while reducing rejects and rework. This descriptive overview highlights how careful film and ink selection, printer calibration, thoughtful design for white underbase and color separations, precise heat pressing, proper curing, and disciplined post-press handling combine to deliver durable, professional results. By following these DTF printing tips, printers and apparel brands can achieve consistent color, improved wash durability, and greater customer satisfaction.