
Choosing the right patches is more than a decorative choice—it’s a strategic blend of branding, identity, and durability that frames how your message is seen on apparel and gear. From patch materials to patch colors, patch sizes, and finishing options, making the right pick sets the tone for how well the design communicates and wears over time. A thoughtful selection considers the garment type, wash cycles, and how to select patches, and how often the patch will be handled, ensuring readability of logos and legibility of text. By aligning these elements with your budget and production timeline, you can avoid common pitfalls like color fading, puckering, or excessive bulk. This embroidered patches guide will walk you through the essentials—from materials and colors to sizing and attachment methods—so your patches endure everyday wear while delivering a cohesive brand statement.
Beyond traditional fabric badges, you can think of these identifiers as emblems, insignias, or crests that convey your brand on clothing and gear. Options include embroidery, woven textures, or molded PVC, with attention to backing, readability, and how the color palette translates across different fabrics. In practical terms, this LSIs-guided approach uses related terms such as how to select patches, patch materials, patch colors, and patch sizes to build semantic relevance.
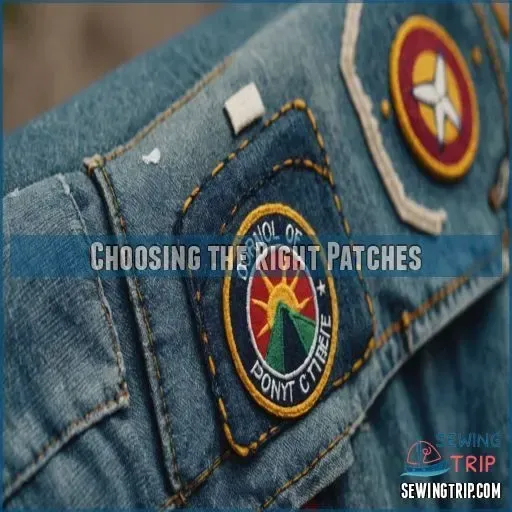
Choosing the right patches: a practical overview
Choosing the right patches starts with understanding the core variables that affect appearance, durability, and cost. This overview sets the stage for evaluating patch materials, patch colors, and patch sizes, along with backing options and finish details. By framing your decisions around how the patch will be used, washed, and displayed, you can make selections that balance aesthetics and performance.
As you plan, use a structured approach to how to select patches. This guide highlights the interconnected factors you’ll encounter—patch materials, color strategy, size constraints, and attachment methods—so you have a clear framework before you begin design proofs or vendor discussions.
Patch materials explained: embroidered, woven, and PVC options
Patch materials form the foundation of how a patch looks and wears. The three primary formats—embroidered patches, woven patches, and PVC patches—each bring distinct visuals, textures, and durability profiles. Understanding these options helps you match the patch to fabric compatibility, required detail, and budget.
For designers and procurement teams, the embroidery density, surface texture, and backing choice matter as much as the core design. The embroidered patches guide emphasizes how to balance stitch count with legibility, while PVC patches offer bold color and a flat, durable alternative for outdoor gear and uniforms.
Colors that convert: patch colors, contrast, and colorfastness
Color strategy is essential for legibility and visual impact. When selecting patch colors, you should consider the logo palette, garment color, and lighting conditions to ensure strong contrast and brand fidelity. This is where patch colors and precise color matching come into play, so your patches read clearly from a distance.
Colorfastness and finishes influence long-term appearance. Testing color stability under multiple washes, sunlight exposure, and abrasion helps prevent fading. Edge treatments, such as merrow borders, can either blend with the patch or serve as a deliberate accent to enhance readability and overall impact.
Size matters: patch sizes and scale for different garments
Patch size dictates visibility, budget, and how well a patch sits on a garment surface. Guidance on patch sizes covers typical ranges for chest logos, back panels, sleeves, and hats, helping you balance prominence with proportion. Consider readability zones to ensure text and intricate details stay clear as the garment moves.
The shape, density, and placement strategy all interact with size. A dense embroidery on a thick fabric may read as bold but risks looking crowded on lighter materials. Conversely, a woven patch with fine lines can preserve detail in a smaller footprint, making patch sizes a critical design lever.
How to select patches: a step-by-step approach
How to select patches begins with a clear purpose and audience. Define whether the patch is commemorative, a brand badge, or a functional identifier for uniforms. This step anchors decisions about format, backing, color strategy, and lifecycle expectations.
Proceed with a practical workflow: choose patch format (embroidered, woven, PVC) based on detail and budget; pick backing (iron-on, sew-on, Velcro) for wear patterns; set a color strategy with tested colorfastness; determine size and placement; and review proofs for scale and appearance. This step-by-step method keeps production aligned with design intent and budget.
Finishing touches and lifecycle: backing, borders, and care
Finishing details determine how a patch reads in real-world use. Backing choices—iron-on, sew-on, or Velcro—affect installation ease and durability, while border styles (merrow vs laser-cut) influence edge durability and visual style. Finishes and coatings can add water resistance or abrasion protection, particularly for PVC patches or patches used in harsh environments.
Management of care and lifecycle ensures patches stay legible and intact over time. Guidance on laundering, reordering, and modular options (like interchangeable Velcro-backed patches) helps you plan for replacements and seasonal updates. A thoughtful lifecycle approach reduces surprises and preserves brand consistency across batches.
Frequently Asked Questions
Choosing the right patches: how do patch materials influence durability and appearance?
Patch materials determine texture, weight, and wear. Embroidered, woven, and PVC patches each have advantages: embroidery offers durability and a premium feel; woven patches provide fine detail with lighter weight; PVC patches deliver rugged, weather‑resistant color. Consider garment fabric, wash frequency, and budget when selecting patch materials for your project.
Choosing the right patches: how to select patches for the best patch colors and contrast on garments?
Start with a clear color strategy and colorfast testing. Use precise color matching (PMS or vendor palette) to keep patch colors consistent, and ensure high contrast for readability against the garment. Verify colorfastness through proofs and tests to prevent fading after laundering and sun exposure.
How to select patches: what patch sizes work best for different garment placements?
Patch size should fit the placement and viewing distance: 2–4 inches for chest logos on jackets, smaller 1–1.5 inch patches on sleeves or caps, and larger patches for back panels. Consider readability, stitch density, and fabric texture—dense stitching can overwhelm thin fabrics, so choose sizes that balance visibility with comfort.
Embroidered patches guide: what should you know when choosing the right patches for logos and branding?
An embroidered patches guide highlights texture, stitch density, and edge finishing. For logos with solid colors and fine details, embroidery offers durability and a premium look, while other formats can suit softer fabrics. Review proofs to ensure scale, color accuracy, and legibility before production.
Choosing the right patches: how patch colors interact with garment colors and lighting conditions for visibility?
Aim for strong contrast between patch colors and the garment to maximize legibility from a distance. Test against different lighting and fabrics, and consider colorfast threads and UV resistance for outdoor use. A balanced color strategy supports brand recognition and reduces misreading of the logo.
How to select patches: what factors in patch sizes and border styles affect readability and cost?
Border style and patch size influence readability and price: merrow borders are durable and clean, while laser-cut borders offer a modern look. Higher stitch counts improve detail but add cost and bulk, so choose sizes and borders that preserve legibility on the garment and fit your budget.
| Aspect | Key Points |
|---|---|
| Patch formats |
|
| Backing options |
|
| Colors and color strategy |
|
| Size and scale |
|
| Edges, finishes, production details |
|
| Practical considerations |
|
| Step-by-step guide to selecting patches |
|
| Cost considerations and vendor selection |
|
| Quality indicators |
|
| Final checklist |
|
Summary
Conclusion: Choosing the right patches is a holistic decision that blends patch materials, patch colors, and patch sizes with backing options, finishes, and care considerations. This embroidered patches guide-style overview helps you understand how to select patches that suit your project—whether you’re prioritizing patch materials, patch colors for contrast, or patch sizes for readability. By following a structured process and reviewing proofs, you’ll communicate your brand or identity clearly and ensure durability through washing and daily wear.