
DTF transfer design best practices lay the groundwork for turning digital art into durable, vibrant wearables. A strong start hinges on color accuracy, fabric handling, and crisp resolution, aligning with DTF printing color guidelines and a clear proofing workflow. Careful DTF fabric selection and attention to DTF print resolution tips ensure the artwork performs on real textiles. Consistent color management and thoughtful DTF garment design considerations minimize color shifts and misalignment during transfer. By documenting these steps early, designers reduce production surprises and deliver professional results that withstand washing and wear.
From another angle, these textile-printing guidelines emphasize reliable outcomes for digital-to-fabric transfers. Using Latent Semantic Indexing (LSI) principles, color fidelity, substrate compatibility, and image sharpness become the core pillars. This approach aligns with practical elements such as DTF color accuracy, DTF fabric selection, and DTF print resolution tips to plan for different substrates. By testing on representative fabrics and documenting the process, you build a repeatable workflow that scales across product lines.
Understanding DTF Printing Color Guidelines for Consistent Results
Consistency starts with the right color framework. By following DTF printing color guidelines, designers align digital work with what will emerge from the printer, ensuring predictable outcomes across screens and fabrics. Establishing a standard color space, typically sRGB for on-screen work and a tailored proofing workflow for print, helps maintain stable color intent from design through to the final transfer.
To keep colors in check, pair your color targets with regular color profiling and soft-proofing. Calibrated monitors, calibrated printers, and a dedicated proofing substrate reduce the risk of drift when you move from the digital canvas to the fabric. Small but deliberate steps—like keeping saturation moderate and avoiding steep gradients—help your design retain its integrity once it’s printed and cured on the garment.
Achieving DTF Transfer Color Accuracy through Proofing and Test Swatches
Color accuracy hinges on verifiable proofing and tangible proof swatches. By performing color checks with physical swatches before full production, you can detect shifts early and adjust before large runs. Printing a small test on the actual substrate you plan to use allows you to compare against the digital proof and catch hue or brightness shifts that could compound at scale.
A rigorous color accuracy workflow includes separating design colors from print colors, soft-proofing against real-world fabric, and validating results with repeatable test prints. Documenting each step—from initial color decisions to final test outcomes—creates a reproducible process that minimizes surprises in production and helps maintain reliable color performance across batches.
Selecting the Right DTF Fabric: How Fabric Choice Impacts Color and Longevity
Fabric selection is the quiet driver of color richness and edge fidelity. DTF fabric selection—not just the design—determines ink absorption, brightness, and how sharp details stay after washing. Testing across typical substrates, such as cotton, cotton blends, and certain poly blends, reveals how each fabric type renders color and how it behaves over time.
Beyond base fabric type, factors like fabric lightness, weave, and texture influence outcomes. Light fabrics generally require fewer underbase steps and yield brighter colors, while dark fabrics demand careful underbase/tint adjustments to preserve opacity. Texture and weave can soften edges, so designers should account for finish and pre-treatment, ensuring samples are evaluated under real wear conditions.
DTF Print Resolution Tips: Preserving Sharp Detail on Varied Garments
Resolution is the bridge between design and print quality. DTF print resolution tips suggest aiming for 300–600 dpi at the final print size, with higher detail designs placed toward the upper end of this range to preserve sharpness when scaled. Understanding the complexity of your artwork helps determine the best resolution target, printer capabilities, and ink coverage.
Effective file handling supports crisp results: use print-friendly formats like TIFF or high-fidelity PNG, keep files in RGB up to printing, and convert to CMYK only with careful color checks. Avoid upscaling low-resolution images, rasterize or export vector elements at high resolution, and incorporate safe margins and bleed to protect key details from trimming or garment movement.
Practical DTF Garment Design Considerations for Smooth Transfers
Design considerations for DTF transfers focus on legibility, contrast, and harmony across fabric types. A strong focal point, high-contrast color choices, and clean lines help maintain impact on diverse textiles. Limiting the color palette to a cohesive set reduces color matching challenges and keeps the finished look vibrant without muddying tones.
Layering and opacity require testing on chosen fabrics, as semi-transparent areas can shift after transfer and cure. Text readability is essential, so choose appropriate font sizes and stroke widths, and keep critical elements away from seams or fold lines. Organizing artwork by layers facilitates adjustments without unintended cross-effects during printing or transfer.
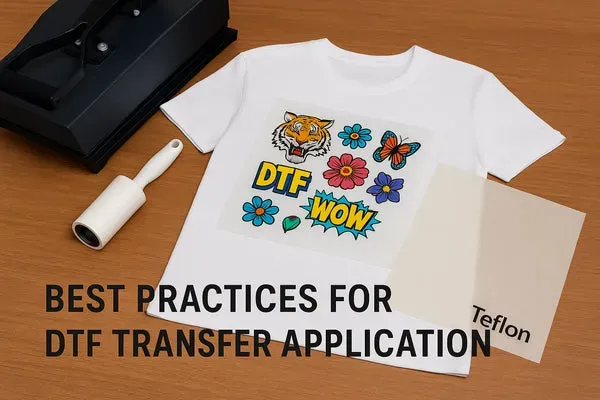
DTF Transfer Design Best Practices: From Concept to Cure and Beyond
DTF transfer design best practices guide the entire journey from concept to cure. Start by preparing the artboard at the target final size with appropriate resolution, color mode, and preserved color profiles. Check color intent against DTF printing color guidelines and plan a proof on a fabric sample to verify how your design performs before committing to production.
A practical workflow emphasizes optimization for transfer, documentation, and post-proof adjustments. Include underbase planning for dark fabrics, finalize and export in a print-ready format, and run a test print on actual garment samples. By recording each step and validating results, you build a repeatable process that yields consistent color fidelity, sharp details, and durable adhesion across product lines.
Frequently Asked Questions
What are the core elements of DTF transfer design best practices for color accuracy and consistency?
DTF transfer design best practices emphasize color management, proofing, and testing. Follow DTF printing color guidelines by using consistent color spaces, proof against physical swatches on the actual substrate, and soft-proofing to simulate the final look. Always verify color accuracy with a small test before full production to reduce surprises on the garment.
How does DTF fabric selection influence transfer design quality and color performance?
DTF fabric selection directly affects ink absorption, brightness, and edge sharpness. Test on your typical substrates and consider fabric type (cotton, blends, or poly blends). Dark fabrics often need underbase adjustments, and textured weaves can soften edges, so plan design details with the chosen fabric in mind.
What DTF print resolution tips help maintain sharp edges across fabrics?
DTF print resolution tips recommend 300–600 dpi at the final size, with higher detail designs closer to 600 dpi. Use print-ready formats (TIFF/PNG) in RGB, avoid upscaling low-resolution images, and rasterize fine details at a safe scale. Include safe margins and bleed to prevent edge cropping.
Which DTF garment design considerations should guide layout and typography?
DTF garment design considerations include a clear focal point, strong color contrast, and a harmonious color palette. Plan for layer management and opacity, ensure text remains legible after transfer, and produce organized layers so adjustments don’t affect other areas during printing.
What is a practical workflow for applying DTF transfer design best practices from artboard to garment?
Follow a practical workflow: set up the artboard at the target size with high resolution and preserved color profiles; check color intent against DTF printing color guidelines; add underbase for dark fabrics when needed; export print-ready files and run a test print on the actual fabric and transfer medium; adjust based on results.
What common issues are addressed by DTF transfer design best practices and how can you troubleshoot them?
Common issues include color bleeding, fuzzy details, misalignment, and washing durability. Address them by verifying color accuracy with proofs, increasing final print resolution for sharp details, using alignment marks and consistent press settings, and providing care instructions to end users to extend durability.
| Topic | Key Points |
|---|---|
| Color considerations |
|
| Fabric considerations |
|
| Resolution and file setup |
|
| Design tips and best practices |
|
| Practical workflow: from design to transfer |
|
| Troubleshooting common issues |
|
| A quick example: applying DTF transfer design best practices in a t-shirt project |
|
Summary
DTF transfer design best practices guide creators toward vibrant color, sharp detail, and durable performance across fabrics. By focusing on color management, fabric selection, and correct resolution setup, designers can reduce production surprises and deliver garments that endure through washes. A disciplined approach to proofing, test prints, and clear documentation helps ensure consistency across batches and product lines. Embracing a systematic workflow, careful file preparation, and thorough testing empowers brands to achieve reliable results that look great wear after wear, boosting customer confidence and brand reputation.