
Pod Studio Setup is more than just gear; it’s a thoughtfully designed space that elevates your home recording studio with clear, inviting sound. A well-planned setup balances acoustics, comfort, and workflow to keep you productive whether you’re podcasting, voicing a video, or laying down music. Smart choices in acoustic treatment and proper room design ensure clean dialogue and warm vocal tones without breaking the bank. The right gear should support your process, from ergonomic desks to quiet peripherals that fit your workflow. With thoughtful planning and scalable components, you can build a setup that delivers reliable results session after session.
In other words, you’re shaping a dedicated home recording space that sounds professional even before you press record. Think of it as studio acoustics optimization, a setup designed for clear dialogue, intimate vocals, and consistent levels that adapt to busy environments. Focus on isolation and resonance control, or what experts call sound isolation and room treatment, to prevent external noise from seeping in and to tame flutter echoes. Key gear like a reliable audio interface, a versatile microphone setup, and proper monitoring helps translate your voice into a polished final product for consistent delivery across scenes. With that approach, your podcast, voice acting, or music sessions will feel cohesive across different rooms and devices.
Designing a Functional Home Recording Studio: Space, Goals, and Acoustic Strategy
A practical home recording studio starts with the room you have. Assess its size, shape, and surface materials to map how sound behaves. In a home recording studio, you plan for acoustic treatment from the start, choosing panels, bass traps, and diffusion to control reflections without making the room sound lifeless. The goal is a balanced, natural tone that translates well to headphones and speakers.
Next, set clear goals: what will you record, how many people, what budget, and how much time you’ll invest in room calibration? A solid Pod Studio Setup starts with a layout that matches your workflow and allows efficient gear integration, including a sensible microphone setup, a reliable audio interface, and a clear monitoring plan.
Acoustic Treatment vs. Soundproofing: Finding the Right Balance
In practice, most pod and music setups benefit from good acoustic treatment rather than pure soundproofing. Acoustic treatment improves clarity by taming early reflections and reducing muddiness, while soundproofing focuses on external noise isolation. For the typical home studio, a balanced approach delivers cleaner dialogue and more consistent performances.
Implement a practical mix: first-reflection panels at 45-degree angles around the listening position to tame flutter, bass traps in corners to control low end, diffusers on the back wall to avoid a dull dead vibe, and a rug to dampen floor reflections. Avoid over-absorption; the aim is a natural, up-front sound that translates across headphones and monitors.
Core Gear for a Pro-Quality Pod Studio: Microphone Setup, Audio Interface, and Monitoring
Your core gear divides into capture, monitoring, and workflow. Start with microphone setup: pick one versatile mic that suits your voice; a dynamic mic can work well in untreated spaces, while a large-diaphragm condenser adds warmth for vocal tracks. A solid mic stand with a pop filter keeps plosives under control and preserves clarity.
The audio interface is the bridge to your computer, offering the right number of inputs, clean preamps, and reliable compatibility with your DAW. For solo voice work, a single-channel interface may suffice; for multi-person podcasts or instruments, two or more inputs unlock flexibility. Monitoring with nearfield monitors or quality headphones completes the loop.
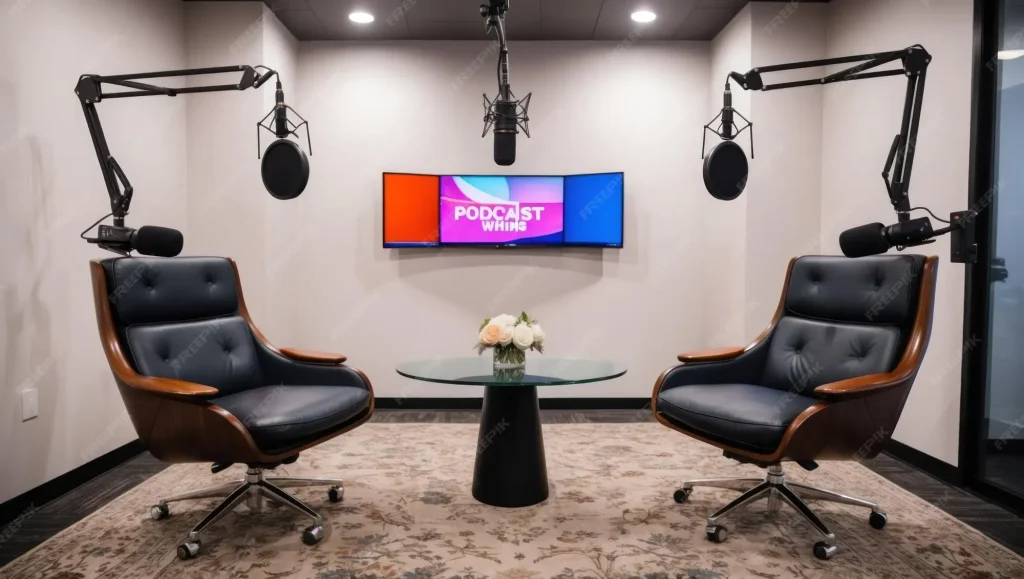
Pod Studio Setup: Designing a Comfortable, Productive Workspace
Creating a space you want to use daily starts with ergonomic desk arrangement, chair height, and room for your microphone arm and computer screen. A well-considered Pod Studio Setup supports long recording or editing sessions by reducing strain and promoting proper breathing posture.
A day-to-day workflow benefits from an organized layout: keep cables tidy, position gear for quick access, and choose lighting that reduces eye strain during long editing sessions. A room that feels comfortable supports longer recording sessions and consistent vocal performance.
Room Layout, Calibration, and Monitor Placement for Accurate Sound
Set your desk so monitors form an equilateral triangle with your head at the apex, which shapes stereo imaging for mixing and VO work. Thoughtful monitor placement coupled with strategic acoustic treatment helps you hear detail in dialogue and music tracks more accurately.
Calibration steps ensure your room translates across headphones and speakers. Use a reference track to set monitoring levels, then measure and adjust EQ or reflection control as needed. Regular checks of your audio interface routing and mic technique help maintain accuracy session to session.
Budget-Friendly Upgrades and Efficient Workflow for Consistent Recordings
You don’t need a pricey studio to achieve professional results. Start with essential acoustic treatment like deep panels on side walls and behind the mic position, then add bass traps in corners to control low end. Small, tangible upgrades can yield noticeable improvements in intelligibility and presence.
Layer in affordable software tools and a sensible microphone setup. Focus on a practical, repeatable workflow: pre-record checks, vocal consistency, and reliable backups. With a steady process, your home recording studio delivers high-quality content without overspending.
Frequently Asked Questions
How do I start a Pod Studio Setup by assessing my space for a home recording studio?
Begin your Pod Studio Setup with a space assessment: measure the room’s size and shape, define the primary use (podcasting, voiceover, or music), and set a realistic budget for acoustics and gear. Use three guiding questions to prioritize upgrades: what is the primary use, how much budget for acoustics and gear, and how much time can you dedicate to room treatment and calibration. The goal is a balanced mix of acoustic treatment and practical gear, not overspending on gear you won’t use.
What is the difference between acoustic treatment and soundproofing in a Pod Studio Setup, and how should I balance them?
Acoustic treatment controls reflections and muddiness for clarity, while soundproofing blocks external noise intrusion. In a Pod Studio Setup, aim for a practical balance by using first-reflection panels, bass traps, and diffusers, along with a rug to dampen floor reflections. Avoid over-absorbing the room to maintain a natural sound that translates well on headphones and speakers.
Which core gear should I prioritize in a Pod Studio Setup for a home recording studio?
Prioritize three core areas in your Pod Studio Setup: capture, monitoring, and workflow. Start with a versatile microphone setup (dynamic mic for untreated rooms or a large-diaphragm condenser for richer vocal capture), an audio interface with enough inputs, and accurate monitoring (nearfield monitors or closed-back headphones). Add a suitable desk, a reliable mic stand with a pop filter, and tidy cables to support your microphone setup.
How should I arrange the room layout and workflow in a Pod Studio Setup to optimize sound quality?
Arrange the room so your desk and monitors form an equilateral triangle with your head at the apex for accurate stereo imaging. Position panels to control early reflections, avoid parallel hard surfaces, minimize noise sources, and route cables along the back of the desk to reduce interference. A well-planned layout plus a smooth workflow improves recording efficiency and consistency.
What budget-friendly upgrades can improve sound quality in a Pod Studio Setup?
Budget-friendly upgrades include adding acoustic panels (about 6–8 panels around side walls and behind the mic position), bass traps in room corners, and a small reflection-free zone around the microphone with a shield or foam panels. Improve isolation with door sweeps, weatherstripping, and heavier curtains, and leverage software tools (compressors, limiters, and EQ) in your DAW to shape voice before mixing.
What common mistakes should I avoid in a Pod Studio Setup to ensure consistent dialogue and vocal quality?
Avoid common mistakes like over-absorbing the room or neglecting reflections, which dulls the sound; poor monitor placement that distorts the stereo image; underestimating microphone technique, leading to inconsistent levels and plosives; skimping on cable management, causing unplugging and noise; and ignoring the room’s noise floor, which still benefits from some isolation and treatment.
| Topic Area | Key Points | Practical Tips / Takeaways |
|---|---|---|
| Assessing the space and setting goals | Evaluate room size/shape, determine acoustics needs, and set three guiding questions to prioritize upgrades and avoid over-investing in gear. | Consider how room dimensions affect treatment and desk/monitor layout; set goals before buying gear. |
| Acoustic treatment vs soundproofing: balancing the two | Acoustic treatment controls reflections and clarifies sound; soundproofing reduces external noise; combine for balance. Key components: first-reflection panels at 45-degree angles, bass traps in corners, diffusers, and a rug. Avoid over-absorbing for a natural, balanced tone. | Use a measured approach; test with headphones and speakers; don’t over-dampen; aim for natural room response. |
| The core gear for a pro-quality home recording studio | Capture: one versatile mic, dynamic or large-diaphragm condenser, plus a stand and pop filter. Interface: enough inputs and good preamps with DAW compatibility. Monitoring: nearfield monitors or quality headphones. Desk/ergonomics: proper height and space. Cables/accessories: tidy management. | Start with a solid mic, dependable interface, and accurate monitoring; upgrade progressively as needed. |
| Room layout and workflow optimization | Desk orientation forms an equilateral triangle with the listener; balance panels to control early reflections; avoid parallel hard surfaces; plan cable routing to reduce interference. | Position monitors for optimal imaging; place panels to reduce reflections at the listening position; route cables behind the desk. |
| Practical upgrades for sound quality on a budget | Budget-friendly upgrades: acoustic panels around side walls and behind mic position; bass traps in corners; create a reflection-free zone; isolation (door sweeps, curtains); software tools (compressor/limiter, EQ) to shape voice. | Start with 6–8 panels in key locations; add traps as needed; use affordable tools to shape tone before mixing. |
| Recording and mixing workflow for a consistent Pod Studio Setup | Efficient workflow: pre-record checks, vocal consistency, monitor calibration, editing strategy, backups and archiving. | Establish a routine: test levels, maintain mic technique, calibrate monitors with a reference track, plan rough edits, and back up projects. |
| Common mistakes to avoid in a Pod Studio Setup | Over-absorbing, poor monitor placement, inconsistent mic technique, poor cable management, ignoring room noise floor. | Be mindful of room balance; place monitors correctly; practice consistent technique; manage cables; address noise sources early. |
Summary
Pod Studio Setup is a practical approach to home recording that blends thoughtful acoustics, reliable gear, and an efficient workflow to produce clean dialogue, warm vocals, and punchy perceived loudness from a comfortable, productive space. This guide emphasizes planning, room treatment, and scalable gear choices rather than chasing premium gear from day one. By assessing your space, balancing acoustic treatment with sound isolation, and designing a workflow that fits your routine, you can achieve professional results in a home environment. The focus on clear dialogue, natural tone, and consistent production helps content creators deliver high-quality podcasts, voiceovers, and music tracks. Start small, measure results, and upgrade progressively, knowing that your Pod Studio Setup can grow with your needs.