
DTF gangsheet builder is changing how small shops scale up garment customization by turning individual designs into efficient multisheet plans. This approach packs multiple artworks onto a single transfer sheet while preserving color fidelity and streamlining the production flow. By orchestrating layout, margins, export settings, and color management, the DTF print workflow guides you from artwork to transfer with consistency and confidence. You’ll reduce waste, speed up production, and ensure repeatable results across batches thanks to a repeatable process and a clear master template. In this guide, we’ll cover practical steps, common pitfalls to avoid, and quick tips that help a growing shop implement gangsheeting with minimal disruption.
In other terms, the concept describes grouping graphics on a single sheet for transfer, using a grid-like approach that aligns edges, margins, and color controls for maximum yield. Think of it as compiling a master sheet where dozens of designs share margins, bleed, and color settings to optimize output. The multisheet layout DTF framework translates individual artwork into a cohesive sheet that printers can handle efficiently. From initial artwork prep to final trimming, coordinating color profiles, alignment checks, and export formats ensures consistent DTF products and a smooth, scalable DTF print workflow.
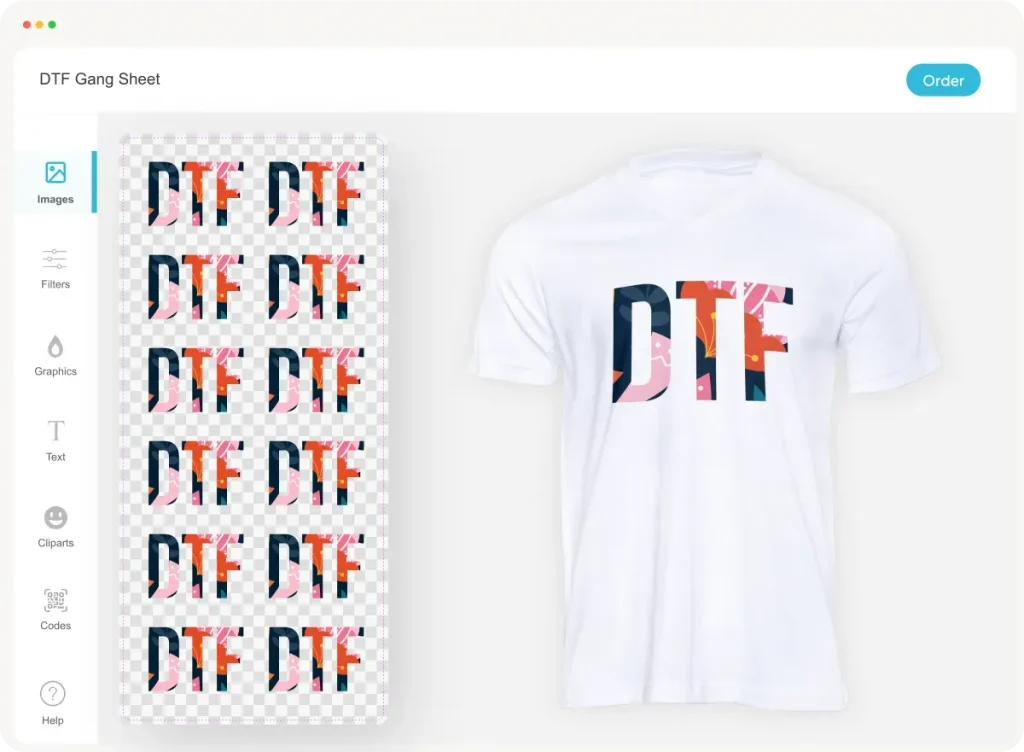
1) DTF gangsheet builder: turning artwork into a sheet-ready multisheet workflow
The DTF gangsheet builder is a comprehensive workflow that combines design preparation, layout planning, and export settings to convert individual artwork into a single multisheet layout. This approach is optimized for printing, curing, and transferring designs onto garments, ensuring the sheet fits your printer’s width and the target transfer size. By starting from a structured gangsheet mindset, you gain clearer margins, reliable spacing, and fewer misalignments from artwork to sheet to garment, which is a cornerstone of an efficient DTF print workflow.
A well-executed DTF gangsheet builder enables you to scale production without sacrificing color fidelity or consistency. The method emphasizes a grid-based layout, consistent margins, and robust export settings so designs travel smoothly from concept to transfer. With repeatable templates and standardized steps, you can reduce waste, increase throughput, and deliver repeatable results across batches.
2) DTF gangsheet tutorial: step-by-step to multisheet layouts
This DTF gangsheet tutorial lays out a practical, end-to-end path from artwork to multisheet layout. Start with artwork readiness, decide on the sheet size, and establish safe margins and bleed. Determine how many designs belong on each sheet and how they will align within the grid—these decisions form the core steps of any effective multisheet workflow.
Next, organize assets, constrain design placement with precise alignment, and add notes for any special handling or orientation changes. Export-ready files should meet your RIP’s requirements, typically PDF or TIFF, with color management configured for your substrate. Finally, perform quick proofs or a small test print to verify alignment and color before scaling up to a full production run within the DTF print workflow.
3) Designing a multisheet layout DTF: grid, margins, and alignment
In the multisheet layout DTF approach, begin by selecting a grid that matches the sheet size and the final transfer dimensions. Decide how many designs fit per sheet (for example, 3×4 or 4×5) and set uniform margins to prevent edge-to-edge color bleed. The grid acts as the framework that guides spacing, alignment, and overall harmony across every transfer on the sheet.
Use alignment guides, snapping, and distribution tools to keep spacing consistent, and create clear orientation rules so all designs share a uniform direction unless a deliberate rotation is part of the collection. Include layout notes or metadata to guide post-print processing, such as cutting or flipping, and finalize with a clean export that preserves essential elements while meeting your RIP’s requirements.
4) From DTF artwork to sheet: preparing artwork and color management
Artwork readiness is foundational: ensure vector elements scale cleanly, raster assets are embedded at the required resolution, and any artwork is prepared for print with consistent quality. Establish a color strategy aligned with your DTF printer’s capabilities, set up ICC profiles, and convert designs to the appropriate color space before layout. If you work with spot colors or color separations, plan how these will translate on the gangsheet to preserve fidelity on transfer.
As you map artwork to a sheet, consider how ink laydown and substrate interaction may affect color consistency across designs. The DTF artwork to sheet process should be reflected in your standard operating procedures so that color intent remains stable from the original artwork through to the finished transfers.
5) Export and print workflow: getting your multisheet layout to the press
Export settings can make or break a run, so choose formats that preserve color integrity and detail. Common choices include PDF with embedded fonts and high-resolution raster images, or TIFF with lossless compression depending on your RIP. If you use vector text, embed fonts or convert to outlines to prevent substitution, and keep in mind the nuances of your DTF print workflow when preparing export files.
Also export a low-resolution preview for internal review and keep a master high-resolution file for final production. After exporting, load the file into your RIP or printer driver, verify color management, and run a small test print to confirm that the layout remains faithful to the design before committing to a full production run within the DTF print workflow.
6) Quality control, pitfalls, and future-proofing your DTF setup
Quality control is an ongoing discipline in the DTF gangsheet process. After exporting, perform alignment checks to verify that each design sits within its grid cell and that margins align with your preset tolerances. Watch for common pitfalls such as inconsistent margins, color shifts from mismatched ICC profiles, and overly crowded layouts that raise the risk of misregistration.
To future-proof the workflow, establish SOPs, reusable templates, and possibly automation or plug-ins that assist with nesting and tiling. Regularly review color profiles, update assets, and scale the multisheet layout DTF workflow as demand grows to maintain consistent quality across large batches.
Frequently Asked Questions
What is the DTF gangsheet builder and how does it support the DTF print workflow?
The DTF gangsheet builder is a workflow that blends design prep, grid planning, and export-ready files to turn individual artwork into a production-ready multisheet layout. It maximizes designs per sheet, ensures consistent margins and alignment, and aligns with the DTF print workflow from art to transfer.
Why choose a multisheet layout DTF approach for DTF artwork to sheet, and what benefits does it bring?
A multisheet layout DTF packs multiple designs into one sheet, reducing material waste and lowering per-transfer costs while delivering a predictable print workflow with even spacing and margins across designs on the sheet.
What steps are typically covered in a DTF gangsheet tutorial for preparing artwork and color management?
In a DTF gangsheet tutorial, prepare artwork with scalable vector elements and correctly linked raster assets, set up color management with the printer’s ICC profiles, decide sheet size and margins, arrange designs in a grid, and export a print-ready file that preserves color fidelity for transfer.
How should you design the grid and margins in the DTF artwork to sheet process to prevent cropping and misalignment?
Define a grid that matches your sheet and target transfer size, set consistent margins and bleed, align each design with guides and snap tools, and maintain uniform orientation to minimize cropping and misalignment during transfer.
What export settings in a DTF gangsheet tutorial ensure color fidelity and print readiness for the DTF workflow?
Export a print-ready PDF (with embedded fonts and high-res raster assets) or TIFF, using appropriate color profiles and ensuring layers not needed for print are flattened or hidden. Include a low-res preview for review to support reliable production in the DTF workflow.
What are common pitfalls in the DTF print workflow when building multisheet layouts and how can the DTF gangsheet builder help avoid them?
Common pitfalls include inconsistent margins, color shifts from mismatched ICC profiles, overcrowded grids causing misalignment, and missing fonts. Use a master template, calibrate your RIP with substrate-specific profiles, run small test prints, and rely on the DTF gangsheet builder to enforce consistent spacing, color mapping, and export practices.
| Aspect | Key Points |
|---|---|
| What is the DTF gangsheet builder? | A workflow and toolset (not just software) to transform multiple designs into a multisheet layout, optimized for printing, curing, and transfer; emphasizes repeatability and alignment. |
| Benefits of multisheet layout | Reduces material waste, lowers costs, enables more designs per sheet, provides a predictable workflow, and improves consistency across batches. |
| Typical toolbox | Vector/raster design software (e.g., Illustrator, Inkscape), a reliable RIP/printer driver, color-management tools or ICC profiles, and a layout approach defining sheet size, margins, bleed, and designs per sheet. |
| Setting up the project | Choose the sheet size and safe margins, decide on cut marks if needed, and document constraints to create a repeatable process. |
| Artwork preparation & color management | Clean vector elements; embedded or linked raster assets at required resolution; establish a color strategy and convert to the correct color space; plan for spot colors or separations as needed. |
| Designing the multisheet layout | Define the grid (designs per sheet), set margins and bleed, place artwork with guides, ensure orientation consistency, add layout notes, and prepare an export-ready file (PDF/TIFF). |
| From artwork to finished multisheet layout | Verify overlaps and safe margins, ensure color mappings are correct, and run a small test proof before a full production run. |
| Exporting for your DTF workflow | Export with formats that preserve color/detail (PDF with embedded fonts or TIFF); embed/outline fonts; export a low-res preview and keep a master high-res file for production. |
| Quality control & alignment checks | Post-export checks in printer software; verify each design sits in its grid cell and margins align; document discrepancies and adjust rules to maintain consistency. |
| Practical tips for minimizing errors | Consistent naming conventions, master templates, safe margins, small test prints, and documented SOPs to reproduce results reliably. |
| Case study | Example: 12 designs on a 12×18 sheet using a 3×4 grid; color profiles matched; test print performed; waste reduced and throughput increased. |
| Common pitfalls | Inconsistent margins, color shifts from mismatched profiles, overcrowded layouts, missing fonts/assets; embed fonts and package assets before export. |
| Future-proofing | Automation via scripts/templates, dedicated gangsheet plugins, and robust RIPs to support tiling and nesting for large batches; aim to minimize manual edits while preserving accuracy. |
Summary
DTF gangsheet builder is a practical approach to turning individual designs into a production-ready multisheet layout. In a DTF gangsheet builder workflow, teams plan grids, prepare artwork with color-ready profiles, verify alignment with quick proofs, and export files that preserve color and detail. This descriptive summary highlights how standardized steps enable higher throughput, reduced waste, and consistent transfers across large batches, helping shops scale their garment customization with confidence.