
DTF transfers for custom merch have transformed how independent creators, small shops, and hobbyists bring screen-printed-style designs to apparel and accessories, delivering vivid color, a smooth hand, and durable performance across a wide range of fabrics, from cotton tees to blends and specialty textiles that pose other transfer challenges. Often branded as direct-to-film printing, this method combines digital design flexibility with a film-based transfer process, allowing for complex color gradients, detail, and soft finishes while reducing upfront investments, setup times, and risk compared with traditional screen printing for short runs and on-demand orders. A practical workflow for success includes planning your design, preparing artwork with a white underbase where needed, and dialing in heat press settings for DTF to ensure consistent adhesion, vibrant saturation, and minimal cracking across multiple fabrics. For every project you explore, you can reference ideas like Custom merch ideas with DTF to spark experimentation with gradients, vintage textures, or photo-real artwork, knowing you have a repeatable process that supports rapid iteration and quality control. Finally, having a basic grasp of DTF transfer troubleshooting, test printing, color management, and post-press care helps you stay on schedule and deliver items customers love, even as you scale from one-off pieces to small collections.
Another way to describe this approach is direct-to-film printing, a film-based transfer technology that lets you decorate a wide range of fabrics with vivid imagery and a soft hand. In practice, you prepare layered artwork, apply a white underbase when needed, dust with adhesive powder, cure, and transfer with a heat press—processes familiar to those who work with DTF but framed in broader terms of film substrates. A key advantage is flexibility across garments, bags, and accessories, with room for color gradients, fine lines, and photographic detail that stays vibrant after multiple washes. To keep quality consistent, focus on heat press settings for DTF, proper curing, and post-press care, and if issues arise, consult DTF transfer troubleshooting guides to refine your workflow.
DTF transfers for custom merch: From concept to production
DTF transfers for custom merch offer a flexible bridge between your digital designs and ready-to-wear items. They enable vibrant color, fine detail, and a soft hand on a wide range of fabrics, including cotton, poly blends, and more, making them ideal for small businesses, hobbyists, and creators who want quality results without a heavy screen-printing setup.
From concept to finished product, establishing a repeatable workflow helps ensure consistency across orders. Plan the final product in mind, prepare color-aware files, and test on swatches to minimize surprises and deliver professional-looking items with reliable wash durability. This approach leverages direct-to-film printing to achieve scalable results while staying adaptable to on-demand runs.
Direct-to-film printing workflow essentials for beginners
Starting with design and material selection, you decide on garment color, print area, and how the design will read at target viewing distances. In Direct-to-film printing, you print onto a DTF film with a white underbase, dust with adhesive powder, cure, and then transfer the image to the garment with a heat press.
Next, verify printer calibration and print resolution, and test with swatches to verify color fidelity. This testing helps manage color, reduces banding, and aligns with your heat press workflow, ensuring a smooth path from file to finished product.
Heat press settings for DTF: how to dial in temperature, time, and pressure
Choosing the right heat press settings is critical for durable results. Start with a flat-press that provides even pressure, and set temperatures around 150–160°C (300–320°F) with 10–15 seconds of press time as a baseline, adjusting for fabric type and film recommendations.
After the initial press, perform a cold or warm peel depending on the film guidance and ink chemistry. Maintain a consistent plan for pressure and hold time to minimize misregistration and color gaps, and run test sheets to dial in your optimum settings before large batches.
DTF transfer troubleshooting: common issues and fixes
Even with a solid workflow, you may encounter issues like white underbase unevenness, color bleeding, or ghosting. DTF transfer troubleshooting starts with checking printer calibration, powder curing, and transfer timing to identify where the breakdown occurs.
For fixes, recalibrate color prints, extend cure time, verify pre-press conditions, and ensure consistent heat distribution across the platen. Document changes, run controlled tests, and iterate your process to steadily improve adhesion, color fidelity, and overall durability.
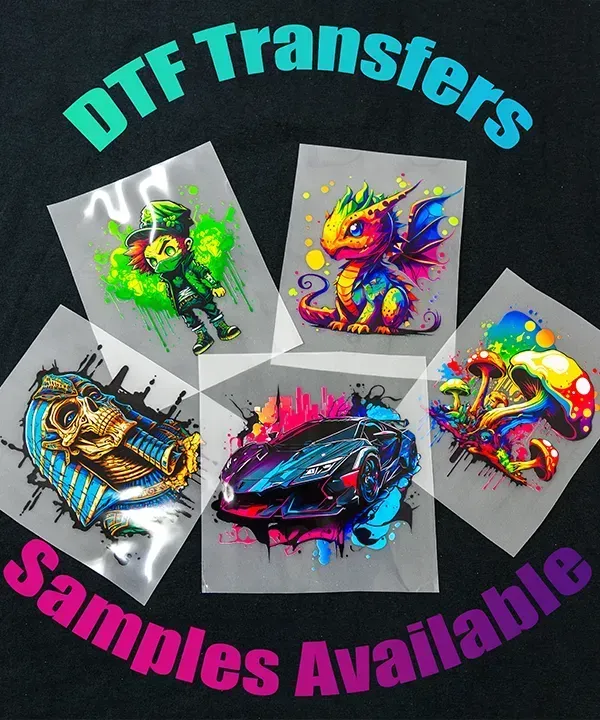
Custom merch ideas with DTF to inspire your product line
DTF opens doors to a broader product line beyond basic tees and hoodies. Consider bags, patches, caps, and accessories that showcase intricate gradients or photographic imagery—great opportunities for small-batch drops and on-demand manufacturing.
Leverage thoughtful design collections, seasonal palettes, and limited-run designs to generate demand. This aligns with custom merch ideas with DTF and helps you differentiate in a crowded market by offering unique items that capitalize on vibrant, durable transfers.
Maintaining quality: testing, curing, and long-term care for DTF prints
Establish a steady workflow by using test garments, a documented SOP, and regular maintenance for your printer, film, and heat press. Recording transfer temperatures, times, and fabric types helps maintain consistency across batches and reduces variability.
Care instructions for customers are essential: wash inside-out, use mild detergents, and avoid chlorine bleach. Proper curing and heat pressing extend the life of the transfer, preserve color vibrancy, and protect your brand’s reputation over time.
Frequently Asked Questions
What are DTF transfers for custom merch and why are they a good option for small businesses?
DTF transfers for custom merch refer to the direct-to-film printing process where a design is printed onto a specialty film, dusted with adhesive powder, cured, and then transferred to fabric with a heat press. This method delivers vibrant color, fine detail, and a soft hand on many fabrics, making it a cost-effective choice for small runs and on-demand apparel compared to traditional screen printing.
How can you optimize heat press settings for DTF transfers on different fabrics?
Start with a baseline of about 150–160°C (300–320°F) for 10–15 seconds at medium pressure, then adjust for fabric type (cotton, poly blends, or blends with stretch). Pre-press to remove moisture, use a protective sheet as needed, and perform a test transfer to refine time and temperature for each film and fabric combo.
What is the DTF transfer troubleshooting process when colors look off or edges misregister?
Begin with printer calibration and color management, verify the white underbase and proper powder curing, and check alignment during transfer. If colors are off, adjust print profiles; if edges are blurred, ensure even heat, adequate pressure, and correct peel (warm or cool) as required by the film. Run a small test before full batches.
What are some custom merch ideas with DTF that perform well on a range of materials?
DTF enables custom merch ideas like photo-quality tees and hoodies, vibrant tote bags, and graphic panels on fabrics with white underbase. You can experiment with small logos on sleeves, full-front art on light/dark shirts, and multi-color gradients on various fabrics for on-demand drops.
What does a practical workflow look like for producing DTF transfers for custom merch from design to finish?
Design and prep with print-ready files, select film and adhesive, print onto the DTF film (white underbase first if needed), dust and cure the powder, cut and weed as necessary, pre-press the garment, transfer with appropriate heat press temperature and time, peel as directed, then cool and follow post-press care guidelines.
How should you care for garments printed with DTF transfers for custom merch to maximize durability?
Turn garments inside out and wash on low heat with mild detergent, avoid chlorine bleach, and air-dry when possible. Proper curing and heat-press settings are essential; store finished items away from direct sunlight to preserve color and adhesion.
| Aspect | Key Points |
|---|---|
| What DTF transfers are | Direct-to-film transfers involve printing a design on a DTF film with a white underbase, applying adhesive powder, curing, and transferring the image to fabrics with a heat press; this method yields vibrant color, fine detail, and a soft hand with durable washes. |
| Advantages | Flexible across fabrics and designs; supports color gradients, small text, and photo-like artwork with less edge spoilage or cracking; color management is forgiving due to digital proofs; offers a strong balance of cost, speed, and quality for on-demand or small runs. |
| Workflow overview | 8-step process: design & prep; material & setup; printing to film; powdering & curing; cutting & weeding; transfer; post-press care; quality checks & troubleshooting. |
| Materials & equipment | DTF film + adhesive; pigment-based inks; DTF printer or a modified printer; hot-melt powder; curing/drying equipment; clean, dust-free workspace; a heat press with even heat and adjustable time/temperature. |
| Printing to film | Print with white underbase (when needed) first, then color layers; ensure film dries completely; calibrate printer and verify color accuracy; align media properly. |
| Powdering & curing | Dust adhesive powder onto the printed film and cure it in a dedicated heater or dryer; remove excess powder to ensure a clean transfer. |
| Transfer preparation | Cut/trim the film as needed; minimal weeding in many workflows; pre-press the garment to remove moisture and prepare the surface. |
| Transfer & post-press | Position transfer on the garment and press at recommended temperature/pressure for 10–15 seconds (e.g., around 150–160°C / 300–320°F); perform warm or cold peel as directed; consider a post-press if needed for full adhesion. |
| Quality checks & troubleshooting | Visually inspect color and edges; test adhesion; wash durability tests; common issues include uneven white underbase, color bleeding, or ghosting with solutions in calibration, curing time, press settings, or fabric choice. |
| Factory setup & optimization | Maintain printer, film, and press; use test garments to benchmark new batches; document SOPs for profiles, temperatures, times, and care; invest in a quality heat press; consider fabric prep to reduce issues. |
| Why this workflow works | Combines design flexibility with repeatable manufacturing; supports a wide range of fabrics and styles; enables on-demand production and fast time-to-market while delivering professional-looking results. |
| Care & durability | Turn garments inside out for washing; use mild detergents; avoid chlorine bleach; air-dry when possible; store away from direct sunlight to preserve print longevity. |
Summary
DTF transfers for custom merch offer a practical, scalable path to high-quality, durable prints across a wide range of fabrics. By following the described workflow—from design and preparation through printing, curing, transfer, and post-care—you can achieve consistent results and faster turnaround. Treat each stage as a controllable variable: printer calibration, powder curing, heat press settings, and garment prep all influence the final look and longevity. With practice, your DTF transfers for custom merch become a repeatable process that supports on-demand production, boutique drops, and expanding product lines, while careful maintenance and documentation help preserve print quality over time.