
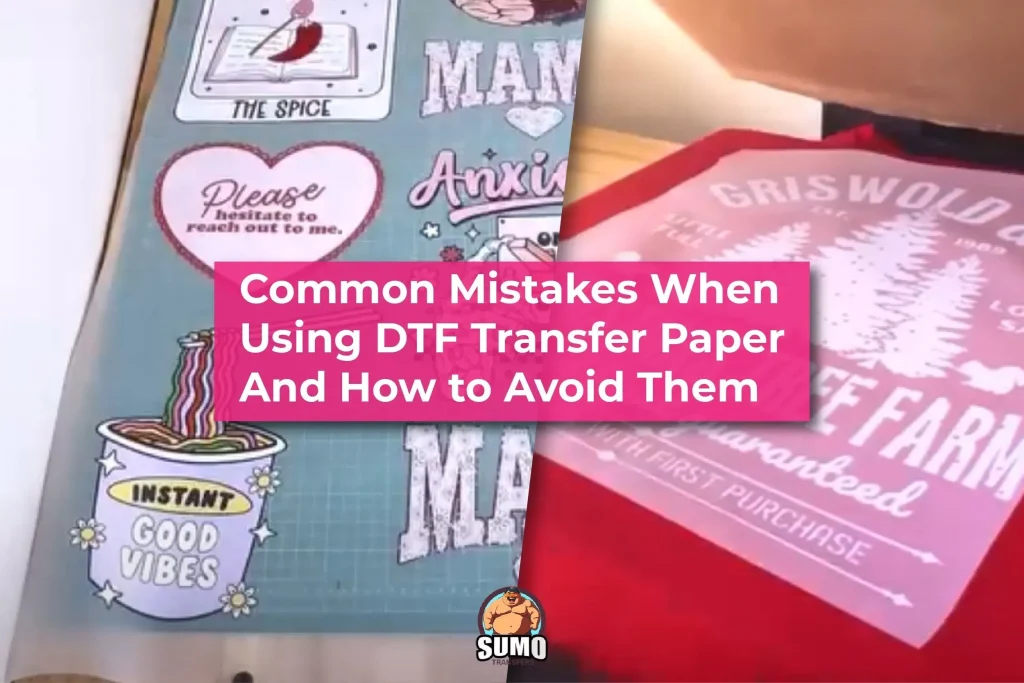
Common Mistakes with DTF Transfers can derail even skilled decorators, but recognizing these common pitfalls early gives you a clear path to reliable, repeatable results across multiple garments and runs, reducing quiet rejections at inspection, saving time, and protecting your reputation for quality. As you embark on a project, lean on DTF transfer troubleshooting best practices to diagnose adhesion issues, color shifts, or edge distortions before they become costly reprints, and document your observations so future runs are more predictable, consistent, and scalable across different production batches, including how to avoid DTF transfer errors. This guide will touch on DTF printing mistakes to avoid, from media compatibility and underbase selection to proper curing times, film choice, powder distribution, garment prep, and post-press handling, so you can maintain vibrant colors, strong adhesion, and durable bonds even across challenging fabrics. Incorporating practical DTF transfer tips and precise DTF heat press settings can dramatically improve ink density, fabric hand, feel, wash durability, color consistency, and overall presentation, reducing waste, downtime, and the likelihood of returns while helping you scale production and meet deadlines. By testing on materials similar to your final product and recording your process parameters, you create a repeatable workflow that you can trust for every batch, making continuous improvement actionable and data-driven, and enabling you to audit results for ongoing quality control.
Expanding on the topic, the discussion shifts to the broader realm of film-to-fabric transfers, where similar missteps show up as adhesion gaps, color misregistration, and inconsistent finish. From an SEO and reader perspective, related terms such as transfer media compatibility, printer-to-fabric calibration, and post-press care become natural LSIs that reinforce the core message. Other semantically linked ideas include workflow optimization, media testing, temperature and pressure calibration, and quality control checks during the cure stage. Together, these terms map to practical steps like pre-wash fabric prep, test swatches, and documented settings, which support reliable results even as equipment and materials vary.
1) Choosing Materials and Surface Prep for Durable DTF Transfers
Selecting high-quality materials sets the foundation for a successful DTF project. Low-quality film, brittle powders, or poorly pre-treated fabrics can dull colors, cause cracking, or lead to weak adhesion. Start with reputable DTF film and compatible adhesive powders that match your printer and heat press capabilities. Always test on textiles similar to your final run before committing to larger batches.
Surface prep matters just as much as the film. Ensure garments are clean, dry, and free of lint, oil, or dust to promote consistent adhesion and image fidelity. Remember that different fabrics—cotton, poly blends, moisture-wicking materials—react differently to the same materials and settings. DT F transfer tips here include choosing lightweight, breathable garments and validating fabric compatibility with your adhesive powder and press. The broader goal is to minimize variables that can lead to DTF transfer troubleshooting later.
2) Artwork and File Preparation: Getting Print-Ready Designs
A surprising number of DTF printing mistakes start with files that aren’t print-ready. Ensure your artwork is high resolution (typically 300 dpi or higher) and uses a suitable color space (CMYK for most printers). Include a clean white underbase where needed and verify final dimensions align with the garment area to be decorated. Proper file prep reduces surprises in the printing stage and helps with color accuracy on fabric.
Always preview how the design will appear on fabric, not just on screen. Underestimating color density for dark fabrics is a common error that can result in a faded or washed-out look. A robust white underbase and careful color management are essential. These steps fall under the umbrella of DTF transfer troubleshooting; if it looks off on screen, it’s likely to look off on the garment as well. The aim is to deliver a file you can print consistently with your printer and film.
3) Calibrating Your Printer for Consistent DTF Printing
Printer calibration is critical to minimize DTF printing mistakes and ensure color fidelity across batches. Regularly check nozzle health, align print heads, and maintain accurate color profiles. Keep a routine for nozzle checks, cleaning, and firmware updates to maintain consistent ink deposition and density. A well-calibrated printer reduces reprints and streamlines the entire workflow.
Use inks that are validated by your film manufacturer and adhere to their recommended color density and curing guidelines. If you notice color shifts or banding, re-check the printer’s calibration against a standard color target and adjust RGB/CMYK conversions accordingly. Consistent printing starts at the device level and feeds directly into the quality of your DTF transfers, aligning with the broader idea of DTF transfer troubleshooting.
4) Powdering and Curing: The Critical Middle Stage
The adhesive powder stage and subsequent curing are where many projects falter. Uneven or clumped powder can cause misregistration or lift after washing. Apply a consistent, even powder layer and shake off excess powder before curing to promote uniform adhesion. A clean, dust-free environment helps prevent stray particles from marbling the transfer.
Curing requires precise timing and temperature. Too little heat or time yields weak bonds; too much can smear colors or damage the film. Always follow the manufacturer’s guidelines and test on scrap garments to dial in the exact settings for your film and heat press. If you notice brittle finishes or cracking after washing, revisit both the powdering and curing steps. This stage is a classic case of DT F transfer troubleshooting: small adjustments in temperature or time often resolve the issue without a full process overhaul.
5) Pressing Technique: Temperature, Pressure, and Time
Pressing is where the transfer becomes one with the fabric. Misjudging temperature, pressure, or dwell time is a frequent source of disappointing results. Pressing at too low a temperature can yield weak adhesion, while too high temperatures can scorch film or distort colors. Use a calibrated heat press and test with representative garments to set a reliable baseline.
Maintain even pressure across the platen, shield the transfer with a silicone sheet or parchment paper to prevent scorching, and ensure the garment lies flat and barrier-free. Time the press according to the film and fabric guidelines, often requiring a short dwell time with controlled cooldown. A practical tip is to perform a test print and sample press before large runs, and to document your heat press settings and outcomes to build a reusable reference for future projects. This approach embodies the essence of how to avoid DTF transfer errors in practice.
6) Common Mistakes with DTF Transfers: Post-Press Care and Troubleshooting
Peel direction and timing are common stumbling blocks after pressing. Some films require a hot peel, others a cold peel, and peeling too early or too late can compromise color integrity or adhesion. Follow the film manufacturer’s peel guidelines and run controlled tests to determine the best approach for your setup. Post-press care also matters: allow the transfer to cool in a clean, dust-free area before handling.
Washing and handling after pressing significantly impact longevity. Provide clear post-press care instructions to customers and avoid aggressive detergents or high temperatures that can erode the bond over time. Documenting your final settings and outcomes helps create a repeatable workflow. In practice, addressing these post-press concerns is a practical application of DTF transfer troubleshooting, reducing the risk of repeat DTF printing mistakes and ensuring durable, market-ready results.
Frequently Asked Questions
What are the most common mistakes with DTF transfers that beginners should avoid?
Common Mistakes with DTF Transfers often come from shortcuts like using low-quality film or powders, skipping surface prep, or choosing fabrics that don’t match the adhesive. To prevent them, use reputable materials, pre-treat fabrics properly, clean the garment surface, and run a small test print on similar textiles before a full run. Following a structured workflow—from design and print to cure, press, and post-press care—helps deliver consistent results.
What are essential steps in DTF transfer troubleshooting to fix common issues?
Start with surface prep and material checks, verify printer calibration and color profiles, and confirm proper curing and peel direction. Use the film manufacturer’s guidelines for powders and films, run test prints, and document your settings to build a reliable workflow and reduce repeat problems.
What DTF printing mistakes are most common and how can I prevent them during the printing stage?
Common DTF printing mistakes include misalignment, color shifts, and clogged or misfiring nozzles. Prevent them by keeping the printer clean, performing regular nozzle checks, validating color profiles, using the recommended inks, and printing a test target before committing to a production run.
What are the best DTF heat press settings to avoid transfer errors and ensure durable results?
Set temperature, time, and pressure according to the film and fabric guidelines, and validate with a test garment. Ensure even platen pressure, use a silicone sheet or parchment to protect the print, and allow a proper cooldown after pressing. Keep a record of your calibrated settings for different fabrics to reduce future DTF transfer errors.
How can I avoid DTF transfer errors during the powdering and curing stages?
Apply a consistent, even powder layer and shake off excess powder before curing. Follow the manufacturer’s curing temperature and time, test on scrap garments, and maintain a clean environment to minimize dust and debris that can affect adhesion.
What post-press care and peel direction considerations help prevent common mistakes with DTF transfers?
Follow the peel guidelines (hot or cold) specified by the film, and allow the garment to cool in a clean area before handling. Use DTF transfer tips such as applying protective layers and providing clear washing instructions to customers. Proper post-press care reduces edge lift and color fading.
| Step | Key Points |
|---|---|
| Step 1: Start with proper materials and surface prep |
|
| Step 2: Perfect your artwork and file preparation |
|
| Step 3: Master the printing stage to avoid DTF printing mistakes |
|
| Step 4: Powdering and curing the critical middle stage |
|
| Step 5: Pressing technique temperature, pressure, and time matter |
|
| Step 6: Peel direction and post press care |
|
| Step 7: Practical checklist to avoid common mistakes |
|
Summary
Common Mistakes with DTF Transfers can slow projects and raise costs, but this descriptive overview shows how to recognize and prevent them to achieve consistent, high-quality results. By understanding typical missteps across materials, design, printing, and post-press care, you can streamline your workflow and reduce waste. This discussion provides practical fixes and real-world examples to optimize your DTF transfers from design to post-press care.